Tuesday, May 31, 2011

Chicken Enchiladas, Casserole Style

A few years ago, my mom hosted a book group at her house.  One of her friends, Lori Durrant, brought an oh so yummy dish: Chicken Chili Lasagna.  I of course had to have the recipe.  Luckily it wasn't a family secret!  This is one of mine and Lee's favorite meals. It isn't your typical Summer meal as it's quite "heavy".  Just think of it as a Sunday switch-up meal. It does take some time to make, but it's easy.  Usually I don't follow recipes when cooking, but I do for this dish.

Chicken Chili Lasagna
Lori Durrant
2 packages (3oz each) cream cheese, softened [I just use one 8 ounce package]
1 medium onion, chopped
2 cups shredded Mexican-cheese blend, divided

2 garlic cloves, minced [I use about a teaspoon garlic powder]

3/4 tsp ground cumin, divided

1/2 tsp parsley [if I have ever used parley, I don't remember!]

3 cups cubed cooked chicken [I use however much chicken I want to use...the most I've used, maybe 2 cups]

1/4 cup margarine

1/4 cup flour

1-1/2 cup chicken broth [I use 1 1/2 cups water along with 2 chicken bouillon cubes]

1 cup shredded Monterrey Jack cheese

1 cup sour cream [I made this on Sunday and realized I didn't have sour cream.  I did have whipping cream.  I added in about 1/3 Cup cream, and 1/3 Cup milk and cooked it till thickened.  Tasted great!]

1 can (4oz) chopped green chilies, drained

1/8 tsp thyme

1/8 tsp salt

1/8 tsp pepper

12 flour tortillas (6 inch) cut in half [I only use 8 tortillas cut in half....I show below how I layer them]


In a mixing bowl, combine cream cheese, onion, 1-1/2 cup Mexican cheese blend, garlic, 1/4 tsp cumin and parsley.  Stir in chicken; set aside.  

In a saucepan, melt butter [or margarine-I use margarine].  Stir in flour until smooth; gradually add broth.  Bring to a boil; cook and stir for 2 minutes or until thickened.  Remove from the heat.  Stir in Monterrey Jack cheese, sour cream, chilies, thyme, salt, pepper and remaining cumin.  

Spread 1/2 cup of the cheese sauce in a greased 13x9x2 inch pan.  Top with 6 tortilla halves, a third of the chicken mixture and a fourth of the cheese sauce [it won't seem like a lot of cheese sauce per layer, but don't worry].  Repeat tortilla, chicken and cheese sauce layers twice.  Top with remaining tortillas, cheese sauce and Mexican cheese.  Cover and bake at 350 degrees for 30 minutes. Uncover; bake 10 minutes longer or until heated through.  Let stand 5 minutes before serving. Yield:  12 servings. 

How I layer this dish...
DSCN1050

Yum, yum!
DSCN1052

Such a fantastic dinner...
DSCN1057

Enjoy!
~Ruth

Monday, May 30, 2011

Chocolate Chip Cookie Cups

Chocolate Chip Cookie Cups 
Recipe adapted from Our Best Bites

These are so incredibly delicious.

Ingredients:
  • Chocolate chip cookie dough--any recipe you like, or store bought
  • Ice cream (I don't recommend using frozen yogurt-it melts too quickly)
The recipe, as found at the link above, suggests using ramekins and claims that this recipe is worth buying a whole set of ramekins.  Well, at my house, that would be a lot of ramekins!  I only have two, from my newlywed days.  I didn't feel like buying 8 to 10 more.  My friend raved about this dessert.  She bought some ramekins just to make it.  I thought about how I could make the same thing at home without having to make an extra trip to the store.  I do a good bit of canning during the summer and over the past few years have acquired a nice set of canning jars. If you don't have ramekins, try using canning jars.

  Make sure they are ones that you can actually use for canning, so they can withstand the temps. in your oven. (Not just recycled glass jars).  They usually have some kind of writing or pattern on the glass. 

The half pint jars (I like to use these for jam) are great for an adult-size serving.  The quarter pint jars  are perfect for the kids (I also use these cute jars for canning chopped green chilies).


 (Cookie dough is so yummy.  I remember when I was pregnant with my third or fourth child, I made cookie dough, minus the eggs, just so I could eat it raw.  It was soooooo good.  You can also replace the eggs with milled flax seed.  1 Tbs. flax seed + 3 Tbs. water=1 egg).

 Scoop in some cookie dough (I love having a cookie scoop!), two scoops for half pints, one for quarter pints.  Set them on a baking sheet for easy transfer to the oven.  Bake in a preheated 350-375 degree oven for about 15 minutes.
 
 The edges should be set and lightly brown, the centers will still be slightly gooey.
Top with a scoop of ice cream and enjoy!   Warning: Jars are HOT.   Be careful when handling the jars.  Don't worry though.  The ice cream helps the jars cool down.  We haven't gotten burned yet.

Scrumdiddlyumptious! ~Lena

This post is dedicated to my younger brother who asked to see this.   

Monday, May 23, 2011

Chili Cheese Fries

One of my favorite leftover re-makes is to take leftover chili and turn it into chili cheese fries.  When my older brother was a missionary  in California, he would sometimes order chili cheese fries at a fast food place out there.  Later, when we were both in college, he would make them for us when I would come over on a Saturday.  His recipe is super easy:

1-2 cans chili
1 bag frozen french fries
Shredded cheddar cheese

Place french fries on a baking sheet.  Spoon chili over the top to cover all the fries then add shredded cheese, to taste.  Bake at 400 degrees until heated and the cheese is nice and melted.

Now canned chili definitely has it place, especially if you are a college student.  (In and of itself, I think it's kind of gross).  I don't have a specific chili recipe that I use since I just kind of throw everything together. 

We ate taco soup a couple weeks ago and I used that for the chili cheese fries shown below.
 
Taco Soup
1/2-1 lb hamburger, browned with 1 chopped onion
Drain and add:
1 can corn
1 can red beans, rinsed and drained
1 can black beans, rinsed and drained
1 can chopped green chilies
3 cans diced tomatoes
1 pkg taco seasoning mix or make your own
Mix together and simmer.
Serve with corn bread, chips, salad or fruit.

Chili will keep well for about 5 days in the fridge and for about 3 months in the freezer.  When you're ready to use it, pull it out of the fridge or freezer, if frozen, thaw the chili out first then make:

Chili Cheese Fries
1 bag frozen french fries (I like the cheap shoestring fries found at Kroger or Walmart) or you can use potatoes that have been scrubbed and cut into fries
Leftover chili or taco soup
Shredded cheese (I like sharp cheddar, but mozzarella or other cheese works well too)

Layer ingredients as listed above (fries, chili, cheese).  Bake at 400 degrees until it's hot and the cheese is golden brown and delicious.  Serve with a salad or other vegetables or fruit.  Yum.
All the produce pictured is from my garden!  Snow peas, strawberries, coleslaw--cabbage, carrots, green onions.

~Lena


Saturday, May 21, 2011

Double Chocolate Cheesecake

One of my favorite all time desserts is cheesecake.  Once, someone I know, mentioned that she had never tried cheesecake because a dessert that had cheese in the name didn't sound appealing.  I replied that it was a good thing to avoid, because once you try it you will have a hard time turning it down after that.

On of my favorite recipes is from the Kraft website for their double Chocolate cheesecake.  It is VERY tasty -- especially since it isn't too sweet.  I hope you enjoy it as much as I have.

Ingredients
24 Oreo Cookies, crushed (about 2 cups)
1/4 cup butter or margarine, melted
4 pkg. (8 oz each) cream cheese, softened
1 cup sugar
2 Tbsp flour
1 tsp vanilla
1 pkg (8 squares) Baker's semi-sweet chocolate, melted slightly cooled
4 eggs
1/2 cup blueberries

Directions
1. Heat oven to 325 degrees F.
2. Mix crumbs and butter; press onto bottom of 13x9 inch foil-lined pan.  Bake 10 min.
3. Beat cream cheese, sugar, flour and vanilla with mixer until well blended.  Add chocolate; mix well.  Add eggs, 1 at a time, mixing on low speed after each just until blended.  Pour over crust.
4. Bake 45 min.or until center is almost set.  Cool completely.  Refrigerate 4 hours.  Use foil to lift cheesecake from pan.  Top with berries.

Thursday, May 19, 2011

No Bake Chocolate Oat Bars


Right now I am in a food science graduate course called Food Lipids. Each week I pick a journal article from a scientific peer-reviewed journal and do a 15-20 minute presentation and write a review paper. This week I am doing my presentation on oxidation and peanut paste (it's kind of like peanut butter). For fun we started to bring different types of food that we could share with the class that related to whatever our paper was about. One week I brought tuna fish sandwiches because I did fish oil and another week I did french bread that we dipped in olive oil because I did olive oil. Since I am doing peanut paste I am bringing one of my favorite desserts that uses peanut butter. Here is the recipe. I do make one change in the recipe. I don't reserve any of the oat mixture to put on top. I put it all on the bottom.

-Stephanie

No Bake Chocolate Oat Bars
Rated:rating
Prep Time: 30 MinutesReady In: 3 Hours 30 Minutes
Submitted By: Traci Servings: 32
"I baked about 100 dozen cookies for the holidays and these were everyone's favorite!! ENJOY!!!"
INGREDIENTS:
1 cup butter
1/2 cup packed brown sugar
1 teaspoon vanilla extract
3 cups quick cooking oats
1 cup semisweet chocolate chips
1/2 cup peanut butter
DIRECTIONS:
1.Grease a 9x9 inch square pan.
2.Melt butter in large saucepan over medium heat. Stir in brown sugar and vanilla. Mix in the oats. Cook over low heat 2 to 3 minutes, or until ingredients are well blended. Press half of mixture into the bottom of the prepared pan. Reserve the other half for topping.
3.Meanwhile, melt chocolate chips and peanut butter in a small heavy saucepan over low heat, stirring frequently until smooth. Pour the chocolate mixture over the crust in the pan, and spread evenly with a knife or the back of a spoon.
4.Crumble the remaining oat mixture over the chocolate layer, pressing in gently. Cover, and refrigerate 2 to 3 hours or overnight. Bring to room temperature before cutting into bars.
ALL RIGHTS RESERVED © 2011 Allrecipes.comPrinted from Allrecipes.com 5/19/2011


Monday, May 16, 2011

Broccoli Salad


Broccoli is in season right now, and we've been able to pick the best broccoli ever from our garden.  The heads are nice and full and the stems are so tender.  Wow.  Springtime always calls for a delicious broccoli salad at our house.

Pick 2 beautiful heads of broccoli--from your garden if you are lucky, or at your local grocery store.
Wash and chop up.  You can peel the big stems and chop those up too, or save to use in a broccoli slaw salad another day.
Add: 1/4-1/2 cup craisins, or fresh grapes
1/4-1/2 cup diced cooked ham, or crispy bacon (about 6 strips)
1/4-1/2 cup sunflower seeds or cashews
1 bunch green onions, sliced (kitchen shears make slicing green onions quick and easy)

Make a dressing with:
1 cup mayonnaise-- light works great too (you can also substitute half of the mayo with plain nonfat yogurt)
1/4 cup sugar
1/4 cup white vinegar
1/2 tsp salt
Whisk dressing ingredients together.  Pour over salad. Mix until thoroughly combined.

Serve with some yummy rolls or bread to complete the meal. 


Friday, May 13, 2011

Fish Cakes

Sometimes I want a fun fish dinner to eat, but we have limited access to fish living in the Midwest--most of the time it is super expensive, and fish sticks are too greasy to eat more than a couple of times a year.  When my Dad worked as a professor, he had the opportunity to do some consulting work with canning trout.  Because of this, we ended up with several cases of the canned trout.  My dad would make them into fish cakes--it was one of my favorite dinners growing up.  A few years ago I was thinking about them, and regretting that I didn't have access to the trout so that I could make them.  Now it might seem obvious to you, but it took me a few days to realize I could use canned salmon or tuna as well.  Nothing beats the taste of the trout, but these other canned fish have a wonderful, unique flavor as well.

Here is my recipe for fish cakes.  I've broken it down to 1 can, and it seems that 1 can feeds 1.5 people (funny # I know, but I hope you can work with it).

Fish Cakes
1 can Tuna Fish
1 Egg
2 Tbs. Diced Onion
1/2 tsp. Lemon Juice
Salt and Pepper (just a few sprinkles of each)
1/2 tsp. Onion Powder
1/2 cup Oats (this is approximate--I just add enough to make it into the consistency of an oatmeal cookie)


Form into patties, then place on a hot griddle either with cooking spray or a little oil.


Cook until golden brown, flip and cook other side until golden brown.  


Serve with homemade buns and tartar sauce.  Super yum and a great Fun Friday Meal!

~Deborah

Wednesday, May 11, 2011

Duvet Covers

I don't know about you - but when it comes to my comforter or duvet cover - I'm really picky. And it doesn't help that all the duvet covers I love are super expensive. So back in our college days I decided to just DIY it and make my own duvet cover. It was so easy and cheap that I don't know if I'll ever go out and buy one.

Want to make your own using my minimal instructions? Well this is what I did. I bought 6 yards of fabric for the part of the duvet that you see (the top) and just used a queen size sheet for the back. You could get away with buying less fabric - but I like having leftovers (for pillows, etc). Next I cut three 22 in x 74 in (I think) panels (obviously do your own measurements). I sewed the panels together to form the front and then placed it on the comforter and pinned the sheet to the front piece (right sides together with the comforter in the middle) to make sure it fit right. Then took the comforter out and sewed up 3 of the sides.

The side I left open was the bottom of the duvet. I purposely made the top piece longer so it would overlap the bottom side. I sewed button holes all along the bottom of the top panel (button holes are actually super easy) and then sewed buttons to the bottom panel, aka the sheet.

What the back of mine looks like:

Insert comforter, hand sew the comforter to the bottom panel (just an X in each corner) so it would slip and slide everywhere and you are done!

Here is the original comforter that I've had since I was a teenager.

My first duvet cover (don't you love our cheap college set up?) ;)

I machine stitched the stem and sewed on the flowers by hand.

My newest duvet.
I wanted something more simple this time around.

Now I just need to make some really cute pillows to dress it up!

Monday, May 9, 2011

Baked Potato Soup

I've gotten a few requests for my potato soup recipe.  I have a couple different ways to make it, but here's a family favorite.  The kids gobbled it up and had 2nds and 3rds.  No leftovers tonight!

Baked Potato Soup

2 Tbs butter, margarine or oil
1 onion, chopped
2 cloves garlic, minced or garlic powder, to taste
3-4 Baked Potatoes, cubed (leftover from a previous meal)
1/2 tsp salt
pepper, to taste
 1/4-1/2 cup diced ham or bacon, optional (also leftover from previous meal)
1/4 cup flour
4 cups milk
2 chicken bouillon cubes
Green onions, sliced, optional
shredded cheese, optional

  • Melt margarine/or warm oil in soup pot over med. high heat.  Add chopped onion, garlic, cubed baked potatoes, salt, pepper, and diced ham or bacon.  Cook for about 5 minutes, until the onion gets soft and clear.  Stir in the flour until it coats everything, then add milk and bouillon cubes.  Continue cooking and stirring occasionally until the milk starts to thicken (about 10 min.).  Do not boil.  The soup will continue to thicken after it is taken off the heat.  Serve topped with green onions and cheese.


This soup works really well in bread bowls.  The bowls add that little bit of flair that takes an ordinary dinner to the next level.  Bread bowls are also great to have when you have guests.  The bowls give a "wow" factor to the meal, taste great and are very filling.  

  • To make a bread bowl, divide a loaf's worth of dough into 4 pieces--four adult-sized bowls, or large roll size pieces--for 6-8 kid-sized mini bowls.  I used the french bread recipe found here.  (Other bread recipes work just as well too).  I was able to make 7 bowls--2 adults, 5 kids--from one french bread loaf which is a bit bigger than my normal loaves of bread  After shaping the dough into balls, place on a greased baking sheet and let rise in a warm place for 30-45 minutes, or until doubled in size.  Gently brush with an egg white mixed with 1 Tbs. of water, if you like crusty bread.  If not, skip it.  

(I doubled the recipe and made sandwich rolls with the other half of the dough for another meal!--hoagies/subway-type sandwiches).  I like to double recipes, such as when I make bread, muffins or cookies, or I double, or make extra of  part of the meal--like when I cook meat--I can use the prepared food later, which saves time and $$.  Excuse the tangent.  Back to the bread bowls: 

  • Bake at 375 for 10 minutes, brush with egg whites again and continue baking another 10 minutes.  Cool on wire rack. 
 
  • Slice top off of bread bowls.
 
  • Scoop out the insides* with a spoon, or with your clean fingers.
 
  • Spoon in your favorite thick soup or stew.
 
  • Enjoy!
*Save the tops and insides from the bread bowls for bread crumbs to top casseroles, baked chicken, or to use in meatloaf.  Save the bread in the freezer until you need it.

Or try my personal favorite--make cheese fondu and use the leftover bread for dipping.  Simply make Deb's thick white sauce, add a couple of chicken bouillon cubes, shake in some garlic powder and onion powder and splash in some worcestershire sauce.  Add a cup of shredded sharp cheddar cheese.  Stir until the cheese is melted and mixed in with the sauce.  Season with salt and pepper, to taste.  Use to dip bread or sliced veggies.  YUM.
~Lena 

Friday, May 6, 2011

Mothers

In Seminary class the past few weeks I've been teaching about the lives and teachings of the latter-day prophets.  Earlier this week I taught the following on how we can become better parents to our kids.  I need to print this out and hang it on the wall somewhere to remind me of how I can be a better mom.  I'm pretty good about doing a lot of these things, and I can see where my own mom and dad followed these same teachings when we were kids.

President Ezra Taft Benson, the 13th latter-day prophet for The Church of Jesus Christ of Latter-day Saints said how mothers can spend effective time with their children:
  1. “Take time to always be at the crossroads when your children are either coming or going.”
  2. “Take time to be a real friend to your children.”
  3. “Take time to read to your children.”
  4. “Take time to pray with your children.”
  5. “Take time to have a meaningful weekly home evening.”
  6. “Take time to be together at mealtimes as often as possible.”
  7. “Take time daily to read the scriptures together as a family.”
  8. “Take time to do things together as a family.”
  9. “Take time to teach your children."
  10. “Take the time to truly love your children” (excerpted from To the Mothers in Zion [address given at a fireside for parents, Feb. 22, 1987].
I took these quotes from the Doctrine and Covenants and Church History Seminary Teacher Resource Manual.
    Just because a lot is expected of Mom doesn't get Dad off the hook, but I'll leave his responsibilities for another post.:)
      I remember my mom doing these things for us.  Even though things were very busy and sometimes a bit crazy, she did all of these.


    Happy Mother's Day Mom!!!  Thanks for following the words of the prophet.  You did such a great job in raising us kids. ~Lena

    Tuesday, May 3, 2011

    3 Month Food Storage

    When we received tax money a couple months back, Lee and I decided to finish our three-month food supply.  My church leaders have counseled us for years to have a year supply of food.  Recently, they have encouraged members to build a three-month supply that consists of one's daily diet, and then gradually build the supply to a year with items that can be store for a long time like wheat, legumes and rice.  Providentliving.org is a great resource to get information from about food storage.  Here is the counsel about the three-month supply from www.providentliving.org:

    Build a small supply of food that is part of your normal, daily diet. One way to do this is to purchase a few extra items each week to build a one-week supply of food. Then you can gradually increase your supply until it is sufficient for three months. These items should be rotated regularly to avoid spoilage.

    My brother-in-law sent me a great tool to figure out how much to buy for long-term storage according to family size at this website: www.trackmyfoodstorage.com

    Before I finished my three-month supply, I had stocked up on some items.  I didn't have a solid plan yet to building my supply, so it was a mixture of all food items.   The tax money allowed me to buy everything at once which was wonderful. (Okay, there were a few shopping trips involved! But it all happened in a short time frame.)

    But, purchasing everything at once may not be feasible for some people.  A great suggestion I heard was to work on a certain mealtime before moving to the next.  For example, buy a few extra breakfast items each week till you have three months' worth of breakfast foods.  Then work on lunch, etc.

    So, this is what I did after I took inventory. Okay, this gets hairy...but hang on and please email me questions so I can clarify if it is too confusing! I planned out a two-week menu for dinner and made a list of things to eat for breakfast and lunch Then since there are about four weeks in a month (I would use this menu twice a month) I needed to repeat everything in my dinner menu six times.  BUT since there are more days than strictly four weeks, I added a seventh week just to be covered (remember my dinner menu has 14 different meals, so for the seventh week I only have to do seven extra meals).  For lunch and breakfast, I figured out how much we ate each week and did three-months' worth.

    To explain the two-week dinner menu: for example, one of the meals is spaghetti.  Since we would eat spaghetti TWICE a month (or once every two weeks), in a three month period I only need enough spaghetti and sauce for approximately 6 meals. (I did seven to be safe.)   Here are my different menus:

    Breakfast:
    Oatmeal
    Cereal
    Syrup
    Boxed milk
    Powdered milk

    Lunch: Peanut butter
    Honey
    Applesauce
    Mac-n-cheese
    Tuna
    Juice boxes
    Canned fruit

    Dinner:
    Beans and rice
    Taco soup
    Spaghetti
    Baked beans & homemade bread
    Alfredo
    Pasta salad
    Stroganoff
    Bean burritos
    Pizza
    Canned soup
    Rice and gravy
    Scones
    Fried rice
    Ramen

    In planning your menu just think of what you eat and how often.  For example at breakfast, we eat oatmeal once or twice a week, have pancakes of some sort once a week and eat cereal the other days.  It takes a little bit of figuring how much of what to buy.  With my three-month storage, I wanted things that would last a long time, but that were everyday items too.  Some things I bought do have a short shelf life--like pepperoni for pizza and the boxed milk for cereal--so I need to make sure and rotate them.  Also I bought some things to go in my freezer, like shredded cheese, butter and bacon (I use bacon in fried rice).

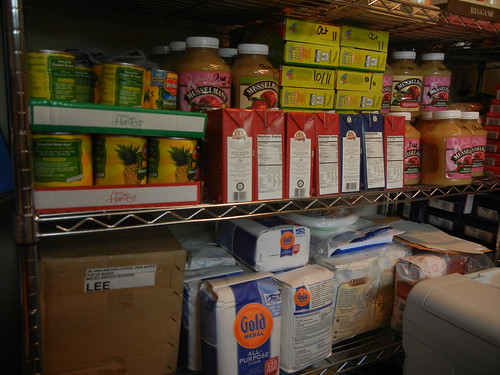
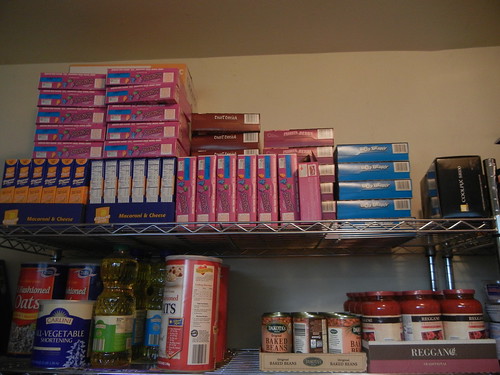
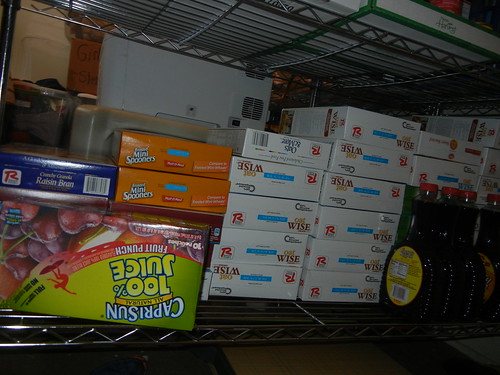
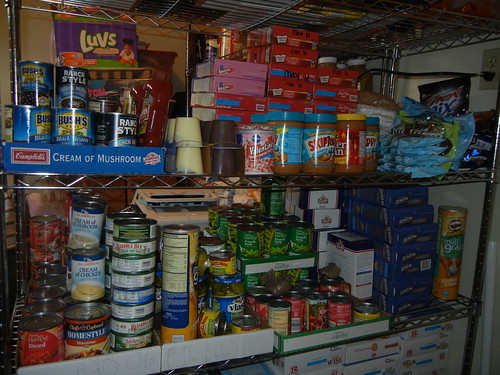
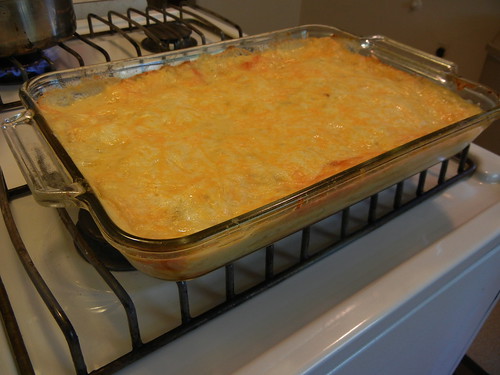
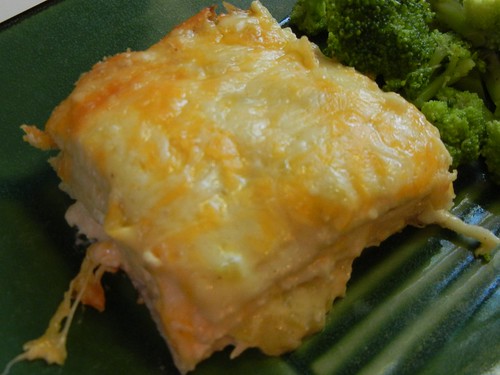
    I also made a list of condiments and other ingredients that would be used in my menu; ranch dressing, salsa, pickles, baking soda, sugar, garlic powder, olive oil, shortening, etc. I can't make homemade bread if I don't have items like salt and flour.  Also, I included items for school lunches for my kids.  I normally give them small boxes of chocolate milk in their lunch, but for the food storage I bought juice pouches.  Also I like to give them a little treat in their lunches, so when I saw fruit snacks on sale for $0.50 a box, I bought enough for the rest of this school year and three-month's worth for this coming school year. (My kids eat a "sack" lunch 4 days a week, then one day a week at school.) Now that I've droned on and on, here are pictures of the loot....
    DSCN0711

    DSCN0710


    DSCN0708
    DSCN0707


    DSCN0705


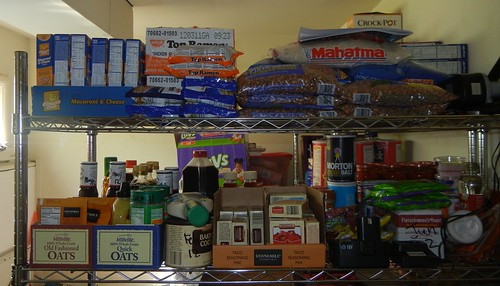
    If you google food storage you will find many resources and ideas.  One thing that I have to keep on top of is rotating the food.  Lately I have been keeping a mental note that if we use a bottle of syrup from food storage I need to buy one the next time I go shopping.  A better idea would be to have a pad of paper and a pen by our shelves to record what we use, or even a white board...but I haven't done that yet. As you might notice on many items I re-wrote the expiration date so it was very obvious to me when that item expires.  Expiration dates are so tiny and sometimes in obscure places.  Thanks Lena for the idea!

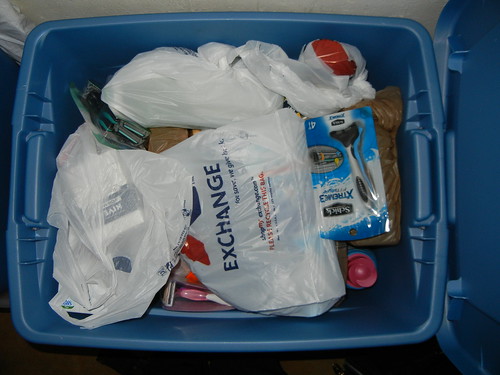
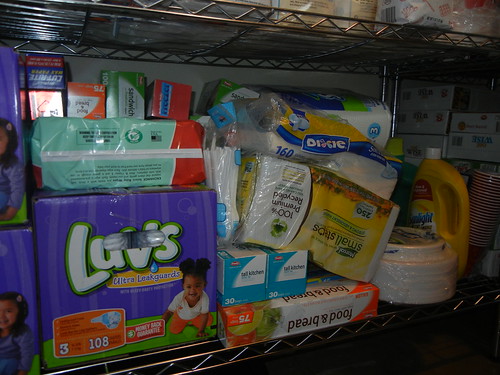
    I also went ahead and did a three-month supply of personal and household items.  I purchased things like face lotion, shaving cream, razor blades, shampoo, dishwasher detergent, laundry detergent, hand soap, diapers, wipes, etc.  I have a SMALL supply of water, and fuel canisters for an emergency stove.  I do need to build up my water supply more and purchase more fuel canisters.  So as long as I don't loose power and water, I am fine!
    Feb 18, 2011 part of 3 month household supply


    DSCN0712


    My husband will essentially be starting his own business this fall, so this gives me an added peace that we will be fine food wise for at least three months!  And to throw in some money advice, my church leaders and other financial counselors/gurus counsel to have a three to six months worth of money saved up to cover the necessities of life in case of an emergency.  Of course save more money if you can.  We finished our three-month emergency fund back in August.  Now I need to start working on a year supply of food basics like wheat, legumes, powdered milk, chocolate, etc.

    Good luck on your food storage!  Please share any tips that you have found helpful in building a food supply and rotating it!

    ~Ruth

    Monday, May 2, 2011

    Homemade Croutons

     
     Homemade croutons are far superior to store bought.  Just look at the example above.  The croutons on the left are homemade, toasty, cheesy, garlicky bits of heaven.  The ones on the right are seasoned, salty, hard little bits of bread.  There isn't even a contest between the two.  And here's the thing--croutons are easy to make.  Super easy to make.  In fact, I don't know why I don't make them more often--they are so incredibly delicious.
     

    Here's what you need to get started to make Garlic Parmesan Croutons:
    Bread--bits and pieces leftover are great, if you don't have enough, just save the pieces in a bag in the freezer,until you do have enough and then thaw the bread to use.
    Garlic Powder
    Parmesan
    Cooking Spray--(You can use butter or margarine, but I like the ease of using cooking spray, with the added bonus of lower fat content!  It doesn't even add a significant amount).

     Cut the bread into cubes--1/2 to 1 inch, or whatever your preference is

    Spray a skillet (over medium heat) with the cooking spray, then add:
    Bread cubes
    Sprinkle with Garlic Powder

    Don't cook it on high, or it will cook too quickly and your croutons will be toast, as in burned toast.  You don't see smoke do you?  :)

    Cook for a couple minutes.  
    Sprinkle with Parmesan cheese.
    Stir the bread cubes around frequently until they are golden brown, about 5-7 minutes.

    Or you can skip the skillet, place the bread cubes in a single layer on a baking sheet sprayed with non stick cooking spray.  Spray the bread cubes and sprinkle with garlic and Parmesan and put in the oven at 300 degrees for 10-12 minutes until the croutons are golden brown and delicious.  

    You can also vary the seasonings according to your tastes.  Try different herbs and seasonings to match your taste buds or salads.

    Or change up the bread, try whole wheat, white, french, sourdough, pumpernickel or whatever you have on hand.   

    There's nothing quite like a garden fresh salad with toasty, cheesy, garlicky bits of heaven.  

    Some of my kids think, "Forget the salad, pass the croutons please!"

    Sunday, May 1, 2011

    Oatmeal Pancakes

    Here is my new favorite pancake recipe. We had them for lunch today after we got home from church. They were so yummy.

    Oatmeal Pancakes
    1/2 cup uncooked oats, quick or old fashioned
    1/2 cup plain yogurt, buttermilk, or milk mixed with 1/2 teaspoon vinegar
    1/2 to 3/4 cup milk
    1 egg or 2 egg whites, beaten
    1 tablespoon oil, preferably canola
    2 tablespoons packed brown sugar
    1/2 teaspoon salt, as desired
    1 teaspoon baking powder
    1 cup flour, preferable half whole wheat and half white
    Optional: dash cinnamon

    1. In a medium bowl, combine the oats, yogur, and milk. Set aside for 15 to 20 minutes to let the oatmeal soften.
    2. When the oatmeal is finished soaking, beat in the egg and oil, and mix well. Add the sugar and salt (and cinnamon), then the baking powder and flour. Stir until just moistened.
    3. Heat a lightly oiled or nonstick griddle over medium heat.
    4. For each pancake, pour about 1/4 cup batter onto the griddle.
    5. Turn when the tops are covered with bubbles and the edges look cooked. Turn only once.
    6. Serve with syrup, honey, applesauce, yogurt, or other topping of your choice.

    Makes 6 6-inch pancakes

    When we made them we put maple syrup on top along with some cream we whipped and frozen mixed berries we made into a sauce. It was really yummy.


    -Stephanie