Saturday, November 30, 2013

Red and Silver Wreath for Christmas

I absolutely love Christmas!  The colors, the smells, the sights become the traditions that are so full of meaning and hold a special place in our hearts like no other.  Traditions are the glue that keeps families strong and bound together.  It is especially fun to create at this time.  Here is a fun tutorial of a wreath that I made for a very good friend of mine.

So I started with a wreath from Hobby Lobby.  The first thing to do when using a fake wreath like this one is to fluff, or straighten the "branches" all in one direction as well as making sure that they are straight.  The next thing I did was take some silver mesh ribbon, cut enough to go around the wreath in a circle a little bigger then the wreath and hot glue the ends on some branches tucked inside.


I took the silver mesh ribbon and tucked it in the branches about every 8" or so all around the wreath until I liked how it looked.  After it looked good, I then hot glued the tucks in place.  Next, I took some silver and red ribbon and tucked it over and across the silver mesh.  When it looked right, I then went back and hot glued it in place as well.


I know that the picture below looks like I skipped a whole bunch of steps all at once, but it really isn't.  First, I took 3 large poinsettias and placed them in the 3, 6 and 9 'o-clock positions on the wreath and hot glued them as well.  I then took some silver ribbon and tied it into a pretty bow.  I took the metal horn and attached it firmly to the wreath with wire.  I then took the silver bow and hot glued it on top of the wire so it wouldn't show.


Here is a close-up of the poinsettias.


And another view of the wreath along with tools and toys for the kids.  Though in a case like this-toys really become tools, since they help keep everyone happy!


And here is the finished wreath.  I got so excited with how pretty it was looking that I didn't take any pictures between the above one and the finished product.  As you can see, I added a smaller bow on top of the silver one with the same red and silver ribbon that I used to go around the wreath.  I also tucked in some berry sprigs on either side of the horn as well as in-between the poinsettias at the bottom.  I also tucked in some red leaf things.  See them in either side if the horn and underneath the berries and bows?  I thought that they really added an elegant touch and complimented the rest of the wreath nicely.  After I liked the placement of everything I went back and hot glued it all into place.


It turned out so pretty!  I can't wait to see it on my friends front door!

Check back in a few days to see another Christmas wreath creation.  Next time it will be a redo wreath for my front door, and it turned out beautiful!

Merry Christmas and Ho-Ho-Ho!

~Deborah 


Wednesday, October 23, 2013

Fun and healthy Halloween Treat

I've seen this pinned on Pinterest several times and decided to make it for my family.


I just took some little baby oranges and some celery, and .  .  .  Voila!  Baby pumpkins!

What fun things have you done with your family this Halloween?

Happy haunting!
Deborah

Friday, October 4, 2013

Kitchen Remodel

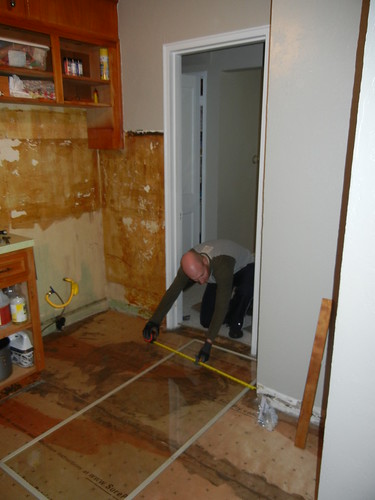
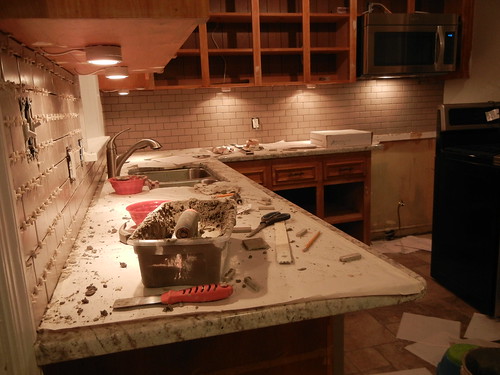
Hello everyone!  It's been awhile since I've posted on this blog.  I regularly (for the most part) keep up on my family blog, but haven't popped in here for awhile.  Recently my awesome husband and I finished remodeling our kitchen.

Here are some sneak peaks.  Head on over to my family blog to see the entire post! Thanks for stopping by!
http://leeandruth.blogspot.com/2013/09/first-kitchen-remodel.html

Dec 18 2012 (4)

May 27 2013 (2)

June 27 2013

Thursday, October 3, 2013

Yummy Mummy Pigs!

Every October, one of my favorite things to do is to make fun foods to eat.  I'm sure a lot of you do this too, since there are cute little cookbooks for sale every year.  Most of these recipes you already know, but I wanted to share with you my favorite ones over the next few weeks!

I think in my top five are Yummy Mummy Pigs!

Basically it is a Pig-In-A-Blanket, but instead of completely covering the hotdog with bread dough, you just use strips and wrap the hotdog like a mummy, leaving a little space bare on one end for the "face".  I like to make the eyes with ketchup.


Happy Halloween!


Boo!


~Deborah

Friday, September 20, 2013

Laundry cupboard cuteness

In my laundry room I have this awesome cupboard that I bought untreated, painted the outside white and the inside a lucious red.  Then life came on strong again and I just used the untreated, unpainted, uncovered shelves.  It doesn't take much thought to guess what happened.  See the picture below.


After a couple of years, they were looking like this.  Not good.  So I bought some cute shelf paper at amazon.com and the above picture turned to the picture below.


Isn't that contact paper cute?  I loved how it turned out, emphasizing the red interior, as well as making sure it didn't get too dark inside.  I wish I had some better pictures to show you, but trust me, the new shelf paper is adorable.

We hope that you are having fun with your redo projects as well!  We'd love to see what you are doing, as well as post your pictures and projects.  Just email us at fivesistersblog@gmail.com with pictures as well as permission to use them along with descriptions.

Happy Beautifying!
~Deborah 


Tuesday, September 17, 2013

45 Club

One day when we were getting everything gathered together to leave for church and I was making sure I had everything I wanted in my bag--mints, tissues and lipstick.  I had the thought how fun it would be to have a box of things like this for my kids.  The problem was, I really believe that things should be earned, not just taken, so I took this thought and tucked it into the back of my mind.

At the same time we were having an issue of everyone getting ready for church early enough.  Something needed to be done to encourage everyone.  I really thought about this for a long time.  As I pondered I came to two conclusions.

1) It needed to be fun.  Sunday mornings should be full of good memories, not frustrations, since when you truly do your best to treat the Sabbath as a holy day, the blessings, both temporal, emotional and spiritual can bless generations.

2) Everyone needed to be ready at least an hour before we had to leave.

After I came to these conclusions, my thoughts about the fun things to have in a scripture bag rose to the surface and the 45 Club was born.

The goal of the 45 club is to be ready by 45 minutes past the hour of choice set by me.  The rules are as follows:

1) You need to be completely dressed in your Sunday Clothes.
2) Pj's put away and bed made.
3) Scriptures and other items needed for church are ready to go.
4) Hair looking nice.

For the prizes, if you make it before 45 past the hour, you get two points to spend.  I've listed some of the prizes and the point values below.

Tic-tacs 2 pts.
Small Pack of Gum 2 pts.
5 wrapped  mints 1 pt.
Pretty fan 4 pts.
Small Notebook 2 pts.
Scripture pencil 1 pt.
Small pill box 1 pt.
Tissues 1 pt.
Roll of Mints 2 pts.
Chapstick 2 pts.

The weather radio is not a prize, by the way!  ;o)

So, we have been doing this for several months and it has been going great.  My two goals of happiness and readiness are being met, so I couldn't be happier!  Sometimes, someone misses out on a week, and have the consequence of no treat.  Usually when that happens, they are the first ones ready the next week.  The treat that my kids grab the most are the tic-tacs.  Let's just say, even though these things are meant for the scripture bags, I don't think that any mints or gum have ever lasted long enough to get to church.

It looks like the 45 club is here to stay!


~Deborah


Wednesday, September 11, 2013

Garage organization is done!

I'm so excited to show you everything I've done with my garage!  

Here is the first thing that I did--put up a huge peg board.  It's nice having all of our camp equipment, fishing poles, hiking fanny packs, lawn chairs and other things hanging up.  We used to have them on nails pounded into the wall, but this way it is easier to rearrange things.  I love how easy it is to grab whatever I need and then when we are finished, it is a breeze to put back--except for the fishing poles, because I'm so short!


The next thing I put up was the shelf below.  I must admit that I am pretty happy about the shelf, because I am not a builder, and I wanted it to custom fit the space and go all the way up to the ceiling.  This whole thing came out of my mind.  I'm so happy how it turned out and with how sturdy it is.  I know that many of you with more skills would make a much prettier shelf, but I am SO happy with how it turned out.


Next I put up hooks for our snow scraper and ladders below.  The second ladder is currently in use on another project, but you can see the hooks for it below the smaller ladder.  It was also nice getting the snow scraper hung up and not leaning on the wall in the corner.  Now it is nice and neat and out of the way.


Next I put up these two shelves in-between the big peg board and the corner shelf.  We have SO many coolers (there are two more that are somewhere else) and it is nice getting these things put up on a home of their own!  


Sorry about the glare on this picture!  On the opposite wall, I hung another pegboard for the random tools that come with home ownership.  This is definitely better than the nails we used to have up!


The next thing I did was to hang up these shelves above the window and 2nd peg board.  Finally, a place for our sprayer and blower and the off season gas can--since the snow blower needs oil in the gas and the lawnmower doesn't.  


Next we have a one of two smaller pegboards.  I had an eight foot long strip of pegboard that I was trying to figure out what to do with as well as some baseboards that had been ripped out.  I realized that it would be perfect cut it down and use it on the wall on either side of the large pegboard.  I am loving the fact that I now have a place for our beach umbrellas and shovels.


. . .as well as smaller, random camping gear, rope and my watercolors.


Next, we have the infamous shelves that were such an eyesore.  They don't look too bad now, do they!  It's nice to have all of my poisons grouped together by pest type!


Last, but not least are the wire baskets below that I re-purposed from my craft room so I have a place to put things that need to be returned to the store or friends, or dropped off when I run errands.  Now they won't be cluttering up my van, or my jacket corner.  I got this idea from Nikki from At Home with Nikki.  You can find her blog here:  http://www.athomewithnikki.com/  

I chose to use wire baskets instead of her plastic ones, so that dust wouldn't build up inside.


Thanks for letting me show you my garage redo!  With the exception of the 4x8 pieces of pegboard, which I had people hold onto the wall while I drilled, I put up everything myself.  Something else I did that really helped, since I don't have a table saw, was that I paid $7 at the lumber yard for them to do all of the cuts for my shelves, which really saved time.

I hope that the project you are working on right now makes you as happy as this one made me!  Stay tuned for the craft room redo of a redo.

Happy Organizing!!!
~Deborah


Wednesday, June 26, 2013

Garage redo

So as part of my goal of following in the footsteps of Daryl Hoole and Becky Beck, I have been working  on reorganizing my garage.  In this post I have some before pictures as well as a couple of finished projects.  Let's just say 2 things. 

1) I absolutely dreaded having people who had to work on our house see the shelves so disorganized.  The only reason I even posted a picture is because now they are better and not awful anymore and I would love you to come over and walk through my garage so I could show you all of the fun things I put in, in person.

2) I love, love, love how with some work, hard thinking, peg boards, and some awesome free pegs that my brother picked up for me at the Boy Scout shop, along with a few other prudent purchases and repurposes, I have been able to redo and make my garage more useable for under $200.  Everything fits better, has a designated place and its made more room to park both vehicles.

Someday, after our house is payed off, I will probably go in, put up new dry wall or some type of sweet garage shelving system and make the garage as pretty as the rest of the house.  But for now, I have two main goals--get organized and get out of debt.  The get out of debt goal means that for the get organized goal to happen, the key is to be creative AND frugal.

Here are some pictures that I took.  Below are the messy shelves and cupboards.


See my shelves that I was building in the corner?  There used to be another cupboard here as well, but we weren't getting the benefit from floor to ceiling storage, so we took it out and will repurpose it in our carport to store my potting supplies.

Where the ladder is now hanging (oh frabjous day!), we used to have our snow shovels all hung up.  It worked ok, for the snow shovels at least, but the ladders were just leaning up against the wall, taking up space.  I was also worried that they might fall backwards and hit something.  I love the ladder hooks that I bought.  They took about 5 minutes to install, to make sure they were level, and created sweet space saving.  Now my husband can park closer to the wall, so both cars have more room.


Make sure you check back on Thursday to see the big reveal.  Well ok, it IS a garage, so the reveal won't be THAT big, but I am sure happy about it!!!

Happy Organizing!
~Deborah

Friday, May 10, 2013

Laundry Room Redo

This year it was time to make a change and take control of my laundry room.

Instead of organizing our laundry, our laundry room stored a lot of food storage.  No room for baskets of clothes.  For our family of 8, this was a problem.  Sorting laundry onto the floor in piles has not worked very well.
I figured out where to relocate food storage items and rearranged shelves a bit.

My awesome husband built this laundry basket dresser from ana-white.com.  It is so awesome.

After painting and sealing the "dresser", I added paint chip labels to my laundry basket "drawers" to help create a uniform sorting system-whites, darks, lights, reds (reds, pinks, purples), towels.  We have an extra basket for the times when we have lots of one color or sheets to wash.


 You get the idea.  This way it makes it easier for the kids to sort dirty laundry too.
 In case you were wondering, the "drawers" really slide out.  Very easily in fact.  Love it!

The other awesome part of my laundry room is something my mom did when we were kids, based on the laundry system by Daryl Hoole.  Each person has a basket where their clean clothes are put.  I can tell the kids to empty their baskets after school and put their clothes away.  Sometimes I'll stick a small treat in their basket (like a Hershey Kiss) and they get a little reward for putting their clothes away.  :)  No more piles of clean laundry folded on the couch, or in the bedroom.  Yea!!!!  Talk about liberating.  This makes each family member more involved with the laundry.  I don't have to put the clothes away or risk my piles being tipped over by random couch or bed jumpers that pass through without warning. 
 
My two year old loves to put his basket of clothes away when older siblings are putting their clothes away.  As kids we had stackable baskets/bins where Mom folded and put our clean laundry.  So awesome, especially for a family with lots of kids.  I decided to use plastic dishpans from Walmart for our baskets.  They cost ~$2.00 each.  Cheaper than the stackable baskets and the kids can carry their clean laundry to their room in their basket, put their stuff away and bring the baskets back to their spot.  I used stacking wire shelves that we were not using to place each basket on (on top of the "dresser"). 

 I could have been fancier with putting names on the baskets, but functionality over cuteness won out (and it was easier).  I just wrote everyone's name with a permanent marker. 
I love my new system.  I've been wanting to implement it for years and finally figured out how to put it in place.  Yes!  Another mission accomplished. 

~Lena

Monday, May 6, 2013

Happy Mother's Day!


Thanks to all the moms out there who have helped us become who we are.  "Life doesn't come with a manual.  It comes with a Mother," lds.org.

Happy Mother's Day!
~The Five Sisters

Thursday, May 2, 2013

Kitchen Table

Eating dinner together as a family is a top priority for us.  Sometimes though, we have to make adjustments to our dining arrangements so the experience of eating together can be more pleasant.    
In the kitchen we had been using my parents' dining table.  It worked okay, but didn't fit quite right with our new kitchen storage bench.  Plus, if the kids leaned on it the right way, it would tip up a bit.  That was kind of weird because it is a solid oak table with pedestal-style legs.  I was ready for a change, and something to match my new bench.  Time to switch things around a bit.

First we had to come up with a design for our table.  We wanted to fill the floor space inside our kitchen storage bench, and we wanted kids to be able to slide around the corners of the table without getting poked by a pointy edge.  The legs were another problem that we went back and forth on.  With the table and bench being banquet style, we didn't want 4 table legs that might get in the way of those sitting next to them.  Pedestal-style legs were another option that we talked about, but we didn't want anything too chunky or ponderous.  One day when we went to the thrift store I saw a table with exactly the right legs for our kitchen table.  The top was junk-laminate covered fiber-board that had seen better days.  The legs were solid wood though and looked in good condition.  The store would sell me the table for $20.  I didn't think it was worth $20.  They let me have it for $15.  Yea!

Sorry I didn't get a picture of the junk table.  Here's a picture of the table we made after my husband stained it.  


 The entire time he was making the table I kept saying, "the table top looks way too wide," "it's too big."  He assured me that for the space we had, the table top was the correct size. 
 It fits our space in the kitchen perfectly.

We borrowed a friend's miter saw to miter the corners.  Since we were doing 45 degree cuts, instead of 90 degree cuts, and added trim to finish the edges, it was easier to use their saw instead of our miter box and hand saw. 

Here's another picture of the legs:
I am so happy with my kitchen table!

How have you solved some of the problems around your house?  We'd love to hear from you.

~Lena

Thursday, April 25, 2013

Storage Diner Bench

Last week I posted about our locker bench.  I mentioned banquet seating that we created in our kitchen.  Sorry we don't have any plans to share.  We built based on our available space.  I've been wanting a bar where the kids can work on one side of the counter, while I work in the kitchen space on the other side.  We could have pulled it off, but one day my friend mentioned staying at a place where a bench was on one side of the counter and how easy it was for her kids to be on one side, while she was on the other.  I also needed storage space for various food storage buckets that seemed to be cluttering up the kitchen all the time.

Here's what we came up with:
The "wall" that you see on the left is actually our locker bench.  We didn't take a lot of pictures of the building process, but here are a few of us finishing it.

I wanted a durable finish so we opted to stain the bench, followed by 2-3 coats of polyurethane.

We had lots of doors to stain.

 
Next time I will be sure to get wood conditioner, so the stain will apply more evenly.  There was some splotchiness that I wasn't thrilled about on the top of the bench.  I corrected it, by staining it darker, but then the doors ended up being lighter.  I think the two tones look fine, but it wasn't planned.  See our food storage buckets kickin' around the kitchen?
 Now they have a home.  Yes!  Mission accomplished.
Check out my awesome new kitchen table next week!

Good luck on your projects!

~Lena