Wednesday, August 31, 2011

Weekday Waffles

With the prices of cold breakfast cereals rising, I've been trying to have other foods available for my kids in the morning.  On weekdays we like toast, oatmeal, granola, eggs, muffins, and sometimes cinnamon rolls.  The most common school-day breakfast these days is wheat toast with jam, peanut butter or honey with a glass of milk or a bowl of oatmeal.  
 

My family loves waffles.  We don't eat waffles very often and when we do, it is usually a Saturday or a General Conference Sunday.  We typically make pancakes on Saturdays.  If the kids get waffles or pancakes on a weekday, they've been frozen from a Saturday breakfast and then heated up in the toaster or microwave.  We love this, but the only problem is they get eaten up so quick! 

With a little planning, your family can enjoy fresh waffles even on busy weekdays.  This yeast waffle recipe is made the night before.  In the morning, plug in your waffle iron and your family can make their own waffles when they are ready to eat.  Each waffle only takes a couple of minutes to cook.

Overnight Waffles from Better Homes and Gardens New Cookbook 2000 edition
2 1/4 cups flour
2 Tablespoons sugar
1 Tablespoon yeast
1/2 teaspoon salt
1/4 teaspoon ground cinnamon (I used 1/2 teaspoon)
1 3/4 cups milk
2 eggs
1/3 cup oil

Mix together dry ingredients; add milk, eggs and oil.  Mix until combined.  Cover loosely and refrigerate overnight.

In the morning stir the batter.  Pour about 3/4 cup batter into a preheated, lightly greased waffle baker.  Close lid quickly.  Do not open until done.  Bake according to manufacturer's directions.  When done use a fork to lift waffle off grid.  Repeat.  Enjoy with butter, syrup or jam.

Precaution:  This meal may be a little too exciting for a weekday.  The kids love it and think it is soooooo fun to make their own waffles before school! 

~Lena

Friday, August 26, 2011

Easy Slipcover for Your Couch--Made Out of Sheets in Under 2 Hours!


Here are some pictures of some of my roses.  

Now--down to the business of making a slip-cover.  I took pictures along the way, but if they aren't super clear--let me know and I will explain better.

Supplies needed
  • 1 Flat Full Sheet
  • 1 Flat Twin Sheet
  • 1 Flat Queen Sheet
  • Sewing Machine
  • Thread to match sheets
  • 1 package of bias tape--any color (optional)
  • Scissors
  • Pins
 About the supplies--I personally like the look of bold, solid colors.  It works well in my home, especially with the art that is hung in my front room.  Because of this, the cheap sheets from Wal-mart and Kmart work well.  I can make a slipcover for under $20.  If you have a fabric that you love, it would be easy to sew strips of it into the dimensions of the above sheets for a totally different look.


1)  Take all cushions and pillows off of the couch.  Take the full sheet and center it on the couch, wrong side up, with the sheet evenly skimming the floor on the front and on the back.  There should be a little bit extra in the middle that you will be able to tuck in so that it will stay in place better.


2)Take out the twin sheet.  Fold in 1/2 like a hamburger.  Make a small cut, and then rip in 1/2.  You could cut it as well, but I love to rip, since it will rip perfectly straight.  Lay one piece on each of the arms of the couch, wrong side up.  Make sure that the hemmed end is touching the floor.


3) Ok, this is where it might get a little confusing, but I will do my best to be clear.  Start on one of the back corners by the floor.  Take the arm piece as well as the center piece and start pinning, going from the floor all the way up until you reach the end of the side of the twin sheet that you are working on.  Repeat on the other side.  Sorry--the picture below is sideways.  I hope though, that this helps to make it a little more clear.


4)  Do the same thing for the front on both sides. (Sorry--another sideways picture.)  Make sure that you keep the hemmed edges that are along the floor even. 
Now, notice above the big gap.  That is ok and how you want it.  It will all be tucked in and not noticed.


5)  Remove slipcover from couch and sew wherever you have pins. You might need to mark it in some way so that you know which side is in the front and which is in the back.This part is all done.  Flip right side out, slip over couch, making sure that you put it on with the front and back in the right direction.


6)  Tuck in loose corners and along where the back meets the seat, until it is nice and tight--making sure that where it touches the floor stays even and straight.


7)  Next, to cover your cushions, take the queen sheet and lay flat, put down cushion, fold over, cut off excess, pin sides, remove from cushion and then sew.  I then like to take my bias tape and along the open edge sew ties on both sides, so that I can tie it closed so it stays on.  You don't have to use bias tape.  I have also taken scraps of the sheet, folded them over 3 times and made my own little strips.  My couch has one big cushion, so I make 4 places to tie it shut.  If you have 3 smaller cushions, then I would do 2 on each cushion.  Put on the cushion and enjoy your new look!


Hopefully in the next 2 weeks I will be posting pictures of my pillow covers.


Happy Sewing!


Deborah

Thursday, August 25, 2011

Frozen Lemon Pie

For Family Home Evening this week I was hankering for some yummy moist chocolatey cake.  It was my son's turn to make the treat, so when he came home I approached him and asked if he wanted to make a chocolate cake for FHE.  Nothing doing Mom!  Okay, he didn't say That, but he found a different recipe to try.  It was from an old ward cookbook (also a gift from grandma), but we had to tweak it just a little.  The original recipe called for morning milk and raw eggs.  I don't have a cow, and the chickens are on vacation.  Actually, I avoid feeding my family raw eggs when I can (I admit I am a sucker for a taste of raw cookie dough, but it is so good!).  But we do try and give Salmonella the cold shoulder when we can.  I'll give you a few versions of what we've come up with.

Version 1
Frozen Lemon Pie
crust:
2 cups graham cracker crumbs
1/4 cup melted butter or margarine
1/4 cup sugar
Mix together and pat half of it into the bottom and up the sides of a 9 inch pie plate, or 9 inch casserole.
filling:
8 oz cream cheese
1/2 cup whipped cream or 1 cup whipped topping
1/3 cup lemon juice
1 can sweetened condensed milk
Whip together.  Pour into crust.  Sprinkle remaining crumbs on top.  Freeze until frozen.  We froze ours for about 2 1/2-3 hours.  Slice and serve. 

Version Two
Frozen Lemon Pie (Food Storage Version)
crust:
2 cups flour (white and wheat mixed)
1/2 cup brown sugar
dash of salt
1/4 cup melted butter or margarine
Mix together to form crumb mixture.  Pat into the bottom and along sides of 9 inch pan. (Pour extra crumbs in another pan). Bake at 350 for 15 minutes.  Cool completely.  Break up extra crumbs if needed.
 filling:
1/2 cup cold milk
1 pkg whipped topping mix (sometimes known as Dream Whip, awesome to have in your food storage).
1/3 cup sweetened condensed milk
2 Tablespoons egg powdered
6 Tablespoons water
1/3 cup lemon juice
Whip together until well mixed.  Pour into cooled crust.  Top with reserved crumbs.  Freeze for 2 1/2-3 hours.  Slice and serve.  

Very refreshing on a hot day.   

Can you guess which one we made?
~Lena

Wednesday, August 24, 2011

Cleaning Tip #1: Your Vehicle

I don't know about all of you, but with five kids my van gets dirty fast.  We'll go to the park and by the time we come home, the van looks as if we've been gone the WHOLE weekend!
Here is what I do to keep my van clean--at least a couple days out of each week.

1. When you get home from the park, school, church, a friend's house, etc. take everything OUT that doesn't belong. After every trip take everything out. It may take a few trips into the house--it's worth it though. I think that is what contributes to a continually messy vehicle: stuff piling up.  Receipts here and there, gum wrappers, empty cracker boxes, a stray sock, etc. all contribute to the mess. This is my best piece of advice for keeping your vehicle clean.

2. EAT in your vehicle.  Okay, this doesn't contribute to cleanliness, but Lee and I travel A LOT and with five kids, it would be practically impossible to not eat in our van. If you do eat in your vehicle, try not eat things that are messy, sticky, or hard to clean up.  For the most part juice and pop are banned in our van (especially something red), Cheetos are a no no, and kids chewing gum (and not keeping it in their mouth) isn't a good idea either. I try to let the kids eat things like pretzels, which are easy to sweep out or vacuum up.

3. Keep a hand brush in the trunk.  I have a pink hand brush in the back of my van that I use quite often to spruce up my van.  Pulling out the vacuum and the extension cord take some time, not to mention vacuuming itself.  I save vacuuming for the big cleaning jobs.  Usually my van just needs a sweep from smashed pretzels, small rocks, bread crumbs, and stray grass and leaves. I can sweep it out in minutes and it looks great!

4. Don't be afraid of carpet cleaner.  Buy a can of upholstery/carpet cleaner from the automotive section to have handy at home.  We just moved a couple of weeks ago, and when I did an over-haul on the vans, the carpet cleaner made such a difference!  It takes some time to scrub the carpets, but oh how nice they look when done!

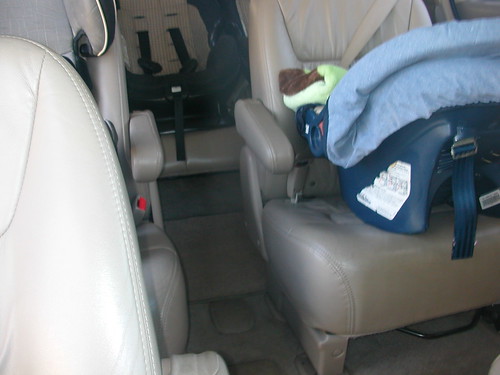
5. Keep wet wipes and a microfiber cloth handy.  I like to grab a couple of wet wipes to wipe down the drink consoles, dashboard, the seats (in the Honda they're leather), the floor boards, and other little nooks--like the area under the lever to recline the seat. After I get the initial dust off of the dashboard, I pull out the microfiber cloth and give it a re-wipe.  (Or you could use a dampened lint-free cloth in the first place.)

DSCN1292

Those are some main tips for having a sparkling clean vehicle. Happy cleaning! You CAN have a continually clean vehicle!

~Ruth

Tuesday, August 23, 2011

Sneaky Eggplant

Okay, okay, an eggplant is far from sneaky.  Especially with the skin still on.  But what if it is transformed?  It can reach new heights.  Let me explain. 

We received a lot of eggplant this summer.  Not from our garden--from a friend's.  Eggplant lasagna was great (except for the eggplant), and Ratatouille was fun to try (only because it was followed by the promise to see the movie of the same name).  I've been intending to fry up some eggplant, dipped in milk & egg and then in seasoned flour, but that just screamed "I am an eggplant!" and even though it's good stuff, I could just foresee a dinner time revolt taking place.  I had to come up with a more subtle approach.

I looked up fried eggplant in The Joy of Cooking by Irma Bambauer.  This cookbook has almost any recipe that you can think of.  My grandma Lena gave me this cookbook when I was in college, and it has been an awesome reference to have on hand.  Anyway, back to the eggplant.  I found a recipe for Eggplant Fritters.  I'm game to try new things.  After frying up a few I decided I had better try a nibble.  Then I had to try another.  And another.  They were good!  I'm glad I doubled the recipe or they may not have made it to the table.  I presented them simply as "Fritters" and the kids were eating them up.  I have concluded that I could probably get away with my kids eating most anything, if I can throw it into a fritter. 


Eggplant Fritters
1 eggplant, peeled and cubed
1 teaspoon vinegar

Add to a pot and cover with water.  Boil until tender.
Drain water, then mash and add:

3 Tablespoons flour
1/2 teaspoon salt
1/2 teaspoon baking powder
1 egg

Mix well.  (Instead of mashing the eggplant and stirring in the other ingredients, I just threw everything in my blender and mixed it that way).

Deep fry spoonfuls of the batter.  Spoon batter into hot oil (365 degrees F),  cook until golden brown.  Turn fritter to brown other side.  If your oil is hot, it only takes a couple minutes to cook each one.  I was able to cook about 3 small fritters at a time.  As always is the case when using hot oil, be careful!  You might get burned!  (And make sure your pan isn't too full of oil, or it might overflow when you add your fritter batter). 

Place fritters on paper towel-lined plate to drain excess oil.  Eggplant transformation complete.  Enjoy! ~Lena

Thursday, August 18, 2011

Creamy Rice with Corn

When you are short on time, nothing beats having a crock pot/slow cooker cooking away all day for you, and then coming home to a hot, healthy meal.  A fun cookbook you may want to try is The Everything Slow Cooker Cookbook by Margaret Kaeter.  I've tweaked one of her recipes a bit (honestly I tweak most recipes according to what's in my kitchen or to make something even better or healthier).  When I made this particular recipe last, my kids kept asking for more.  AHhhhhh. :)  I love when they do that.

Creamy Rice with Corn
3 Tbs olive oil
2 cups uncooked rice (white or brown)
4 cups water
4 bouillion cubes
1 cup milk (whatever % is fine, or use evaporated milk for creamier rice)
1 teaspoon salt
1/2 teaspoon ground black pepper
1/2 teaspoon nutmeg
1 can corn, drained
1 medium onion, chopped
1 8oz. pkg. cream cheese, cubed

In a skillet, over medium high heat, slightly brown the rice in 3 Tbs. olive oil (about 5 minutes). Pour the rice into your slow cooker.  Add everything else except cream cheese.  Cover and cook on low 6 to 8 hours, or on high 3-4 hours.  During the last 30-60 minutes of cooking add the cubed cream cheese.  Stir it into the rice.  Serve it with a salad or fresh fruit on the side. 

Side note:
We are still getting a few things from our garden.  Kirsten picked one of her cantaloupes and it was perfect.  Some cantaloupes are okay or fine, but this one was off the vine and just perfectly ripe and sweet.  Oh, so, good!  I chopped it up and tossed some frozen blueberries on top for a fruit salad.  I also found enough tomatoes, and a couple of bell peppers for a vegetable salad.  I chopped those up, stirred in some chopped olives and cubed mozzarella, splashed on some olive oil and balsamic vinegar, salt and pepper and voila`, a yummy Italian inspired (or maybe just Rachel Ray inspired) salad.  If I didn't have the yummy cantaloupe to finish off my meal, I would have gone back for more.  As it was I probably would have had to fight over it with my mom and dad.  lol.

~Lena


Monday, August 15, 2011

Red Beans and Rice

Sorry we haven't been around lately.  All five of us have been busy with getting ready for school to start, teaching Relief Society, Primary, Nursery, seminary and piano, moving to a new state, starting a new business, painting, yard work, canning, sewing, and the list could go on and on and on. . .  (Just to mention a few of our happenings).  With five of us, something exciting is bound to be happening right this minute, so bear with us as we get settled into our new grooves.  In the meantime I have a new recipe for you to try.

Pull out your crock-pot (or two) and the following ingredients for an easy take on some good 'ol southern food.

Red Beans and Rice~ my variation of a recipe found here.
1 pound red beans (dry)-sorted and rinsed
1 onion, chopped
1 pepper, chopped (variety doesn't really matter, use a hot one if you want a kick, or use a bell if you just want to add flavor--if using canned, add it after cooking the beans)
5 chicken boullion cubes
6 cups water
1/2 tsp garlic powder
1 tsp cajun or creole seasoning
1/4 lb smoked sausage, sliced (I used turkey sausages that were precooked--they look like hot dogs).

Put all the ingredients in your crock-pot and then cook on low all day or on high for 4-5 hours.

Rice
2 cups Rice
4 cups Water

About 25 minutes before serving dinner, bring your rice and water to a boil, then cover and simmer for about 20 minutes, until the water is absorbed and the rice is nice and tender.  Or a couple hours before dinner, give another crock-pot a quick spray with some nonstick cooking spray, put in the rice and water and cook on high.  The rice will be perfect in time for dinner.  To serve, ladle some red beans into your bowl and put a scoop of rice on top.  Serves 8-12.  Or serves 4-6 with leftovers to put in the freezer for another hectic day.  :)

~Lena

Tuesday, August 2, 2011

Homemade Fondant

Along with keeping our grocery bill low, we don't spend a lot of money on birthdays either.  Since we skimp on the presents at present, my husband and I make a fun cake for the birthday child.  Our inspiration came from Breadmaker when she shared a fondant recipe with me.  Check out the recipe and give it a try!  Also, check out many of the cakes Breakmaker has done. It is easy to make, but requires some time.  Also, purchase gel food coloring if you don't already have some on hand. The liquid food coloring will add too much water to the fondant and you'll end up using a whole bottle (or more!) to achieve your desired color.


Homemade Fondant

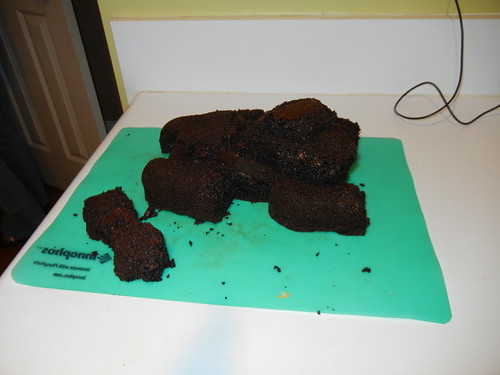
After you cut out the cake shape, frost it.  You can use a homemade butter cream frosting or a tub from the store or whatever kind of frosting you like!
Mar 14 2011 Elden 2nd bday cake

After frosting, then roll out the fondant and start decorating!  Reading the fondant recipe will also give you tips on how to handle and use the fondant.

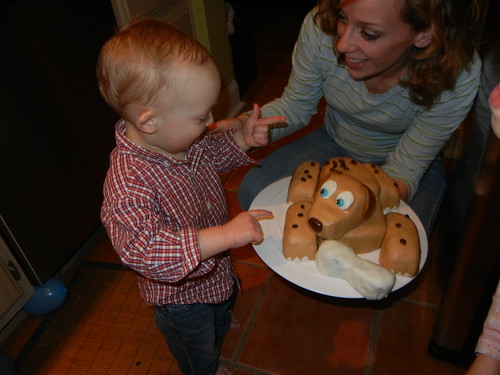
The finished product!  Our little guy seems quite happy!
Mar 14 2011 Elden and dog

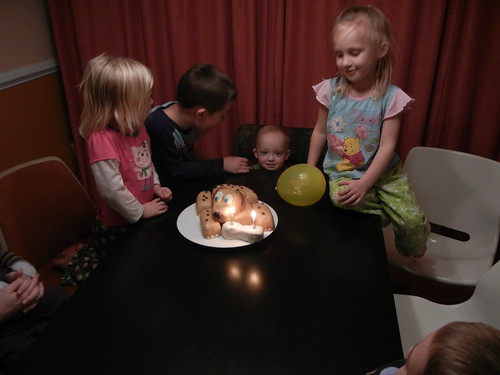
Happy birthday sweet boy!
Mar 14 2011 Elden Shanna Clark Haley 

~Ramen Queen

Monday, August 1, 2011

Together Again

The Five Sisters got together for a wonderful reunion last week (our brothers were there too).  My sisters are so cute!  It was awesome spending time together and seeing each other's families.  Everyone was there except for one brother and his family.  They were sorely missed.  We actually had two reunions back to back, with Deb hosting the first and Ruth the second.  Thanks girls!!! 

Our family has a tradition of having a pie eating contest when we get together for our yearly reunion. (Thanks Ruth for doing it!  Sadly I forgot to do it when I hosted last year, but I'll attribute my forgetfulness to mommy brain and a new baby).  Back in the day, my grandma would make dozens of little pie shells which would then be filled with bananas, vanilla pudding and topped with whipped cream.  I have fun memories of learning how to roll pie dough with my cousins at Grandma's house.  Some of my cousins/siblings could eat the pie in one or two bites.  They probably still can.  You may think, "wow, small pies."  But really, I think they just have big mouths. ;) 

We divided everyone by age (0-6, 7-10, 11-adult with men and women being separate).  No hands can be used, and for the adult category, hands need to be behind your back.  The person to finish their pie first wins.  My grandma would usually have a pie for the winner.  Lately, the prestige of being the winner is usually prize enough. :)


My little girls didn't know what to do, so they just sat there and wouldn't touch their pies until someone gave them forks to eat with.  Next time we should have the little ones go after the bigger kids so they know what to do.

My little guy was one of the winners.  The "secret" to winning is to get as much of the pie as you can on your face, then you have less pie you have to get in your mouth and actually eat. 
~Lena