
Wednesday, January 25, 2012
Italian Meatball Soup
Recipe adapted from Our Best Bites
This recipe is so easy, my 9 year old daughter can make it. You can throw everything into a slowcooker and let it cook all day when you are busy. Just cook the noodles separate and stir them in when you are ready to eat.
Italian Meatball Soup
1 can diced tomatoes
1 onion, chopped
1 green or red pepper chopped
3 carrots, peeled and sliced, or 1 can sliced carrots
2 cups spaghettie sauce
4 cups water
4 beef or chicken boullion cubes
1 recipe of meatballs (see below)
1 16 oz. package of pasta (your choice)
Put everything in the crockpot and cook on low all day, or simmer on the stovetop 30 minutes before you eat. During the last 10 minutes of cooking, add the pasta, cook until the pasta is as tender as you like it. Serve with yummy garlic bread.
My Meatballs or Meatloaf or Hamburgers (oh my!)
1 pound ground beef
1 medium onion, diced (diced green pepper is good too, but optional)
1 cup bread crumbs (I like to use my homemade wheat bread. I pulse the bread in my blender to make crumbs).
1/3 cup milk
1 egg
1 Tbs. Worcestershire sauce
2 or 3 Tbs. ketchup (just squirt some in)
1 tsp. mustard (optional)
1/2 tsp garlic powder (or to taste)
Salt and pepper to taste (obviously you won't taste the raw meat, I hope! Just sprinkle some on.)
Mix everything together. If the mixture is too dry, add a little more milk. If it is too wet, add more breadcrumbs. If making meatballs, form into balls and place on wire racks on top of a baking sheet. Bake at 350 degrees for 20-25 minutes or until done. You can use the meatballs at this point, or cool and place into a freezer bag and freeze for up to 3 or 4 months.
If you are making a meatloaf, put the mixture into a loaf pan and bake at 350 for 25-30 minutes. It will shrink as the fat cooks out. Drain off the fat. You can serve immediately, or cool it and wrap it to freeze. I love to freeze it and then I have a quick meal. Simply thaw in the microwave and serve. Instant potatoes work well as a side dish when you are crunched for time.
If you are using this mixture for hamburgers, scoop up the mixture using an ice cream scoop, to make uniform patties. I put the patties on a baking sheet and flash freeze them. When they are firm, I bag them up, then pull them out when I need them. Cook as you would frozen burgers.
I like making this mixture when I have 3-5 lbs. of hamburger to deal with. I can prep a lot of meals at once with meatballs, meatloaf and hamburger patties, ready to go in my freezer.
~Lena


Monday, January 23, 2012
Resolutions Resolved
January is about gone, and it's been a pretty mild one at that, as far as the weather has been in these parts. Have you stuck to the resolutions made three weeks ago? Many of you may have resolved to lose weight, stick to a budget or get organized. We can probably all do better in these areas of our lives.
Here are some of my tips for losing weight. Check back next week for tips on sticking to a budget.
Lose Weight:
I may not be a weight-loss expert, but I have been on the gain weight/lose weight roller coaster for the last 11 years with having 6 kids. I'm happy to say that so far I've been pretty successful at losing the baby weight each time. Fortunately, I haven't had any problems that would make it harder for me to lose the weight. Here are some tips that have worked for me during this time of my life:
#1. Always eat breakfast, and don't wait a couple of hours to get around to it. After I get up and get dressed, I head to the kitchen. I may not have time to sit down, but I'll at least eat a piece of toast or a cup of yogurt, and then later eat something else. Eating breakfast jumpstarts your metabolism for the day, giving you the energy to get going. Some people like to exercise first and then eat. I don't agree with this practice. At least eat a piece of fruit or something, before you exercise. Once again, this will boost your metabolism. After sleeping all night, you need to break the fast that your body has had while sleeping.
#2. Drink LOTS of water. This is probably obvious, but there are so many health benefits to drinking lots of water. Your body is able to function more easily when you've had plenty of healthy fluids. Stay away from soda pop and limit your juice intake. These days I'm not a fan of either pop or juice. Water and milk are my beverages of choice. Why waste calories on a drink? I'm getting thirsty. Hang on while I go get a drink. . .Ahh, I love water.
#3. Get Moving!!! Aim to exercise 3-5 days a week, 30-60 minutes each day. Hate to exercise? Find something that you like. These days there are lots of choices. I love aerobics, weights, kickboxing, dancing, and walking. Since baby #6, it's been hard to get back into my regular exercise routine. Fortunately (or not, depending on my mood), we have a dog who needs daily walks. If I can get my two miles in for the day, I'm good. One of my favorite video instructors is Deni Preston. She has a show, Total Body Workout on byutv.org. Check her out. It might take a little while to get used to her instructions, but her step aerobics and yoga workouts are really good. She also incorporates weights, bands, exercise balls, etc. into her routines. Very fun. If you still have a hard time, get an exercise bike or elliptical trainer and use it while watching your favorite shows. Then you don't have to think about how much you hate exercising and your body will thank you.
#4. Change something in your diet. You don't need to change everything, and you don't need to do anything fadish. If you eat white bread, change to wheat. Eat whole grain cereals for breakfast (my personal favorite is bran flakes). If you use vegetable oil in your baking, switch to canola oil. Limit fats, and eat more fruits and veggies. Make more meals from scratch instead of using prepared foods. This will not only help your health, it will also be good for your budget.
~Lena
.
Here are some of my tips for losing weight. Check back next week for tips on sticking to a budget.
Lose Weight:
I may not be a weight-loss expert, but I have been on the gain weight/lose weight roller coaster for the last 11 years with having 6 kids. I'm happy to say that so far I've been pretty successful at losing the baby weight each time. Fortunately, I haven't had any problems that would make it harder for me to lose the weight. Here are some tips that have worked for me during this time of my life:
#1. Always eat breakfast, and don't wait a couple of hours to get around to it. After I get up and get dressed, I head to the kitchen. I may not have time to sit down, but I'll at least eat a piece of toast or a cup of yogurt, and then later eat something else. Eating breakfast jumpstarts your metabolism for the day, giving you the energy to get going. Some people like to exercise first and then eat. I don't agree with this practice. At least eat a piece of fruit or something, before you exercise. Once again, this will boost your metabolism. After sleeping all night, you need to break the fast that your body has had while sleeping.
#2. Drink LOTS of water. This is probably obvious, but there are so many health benefits to drinking lots of water. Your body is able to function more easily when you've had plenty of healthy fluids. Stay away from soda pop and limit your juice intake. These days I'm not a fan of either pop or juice. Water and milk are my beverages of choice. Why waste calories on a drink? I'm getting thirsty. Hang on while I go get a drink. . .Ahh, I love water.
#3. Get Moving!!! Aim to exercise 3-5 days a week, 30-60 minutes each day. Hate to exercise? Find something that you like. These days there are lots of choices. I love aerobics, weights, kickboxing, dancing, and walking. Since baby #6, it's been hard to get back into my regular exercise routine. Fortunately (or not, depending on my mood), we have a dog who needs daily walks. If I can get my two miles in for the day, I'm good. One of my favorite video instructors is Deni Preston. She has a show, Total Body Workout on byutv.org. Check her out. It might take a little while to get used to her instructions, but her step aerobics and yoga workouts are really good. She also incorporates weights, bands, exercise balls, etc. into her routines. Very fun. If you still have a hard time, get an exercise bike or elliptical trainer and use it while watching your favorite shows. Then you don't have to think about how much you hate exercising and your body will thank you.
#4. Change something in your diet. You don't need to change everything, and you don't need to do anything fadish. If you eat white bread, change to wheat. Eat whole grain cereals for breakfast (my personal favorite is bran flakes). If you use vegetable oil in your baking, switch to canola oil. Limit fats, and eat more fruits and veggies. Make more meals from scratch instead of using prepared foods. This will not only help your health, it will also be good for your budget.
~Lena
.
Sunday, January 22, 2012
Whole Wheat Bread
Though my sister Lena has been encouraging me to do this for several years, I just started making my own wheat bread--regularly. I bought 50 pounds of wheat, pulled out my wheat grinder a few weeks ago and I'm still baking bread! It's been fun using the wheat flour in other things took like brownies, pumpkin muffins and pancakes.
When Lee's parents were here last fall they bought me some cans for bread "pans". I didn't think I had any traditional bread pans, but turns out I did! I like baking the bread in these cans. Funny enough, Lee grew up thinking homemade wheat bread was always round. It's fun to have round bread! I still buy bread for the boys' lunches. Maybe this fall when 4/5ths of my kids are in school they'll be using homemade bread for sandwiches.
Grease your cans well!


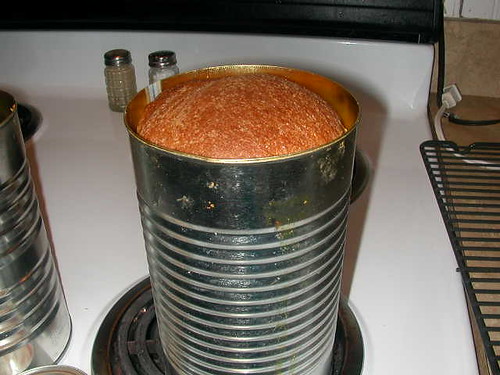
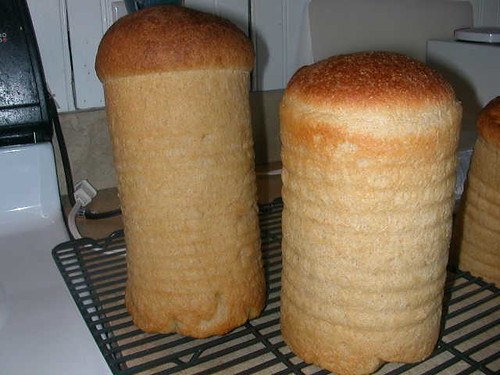
My bread also puffs up tall and makes a "mushroom" top. Let them cool upright. If you lay them on a cooling rack one side of your bread will be flat...which is fine too.
Here is my mother-in-law's recipe for whole wheat bread. Also, my sister-in-law Cindy added her changes too. I've used brown sugar and honey. So far I think I like how the honey one turns out better. I use whole wheat flour and have never used wheat gluten. Lee and I like how it turns out. Feel free to play around with the recipe like Cindy has--her comments are in the recipe! It's a good one!
6 cups hot tap water
2/3 cup oil
2 Tablespoons salt
2/3 cup honey (or brown sugar) (I use brown sugar)
2. Add the following and continue mixing until batter thickens and is sticky (about 5-10 min): (I do the full
10 minutes but watch the Bosch as it may jump off the counter –that’s another story)
6 cups whole-wheat flour (I use 3 c. white flour and 3. c. whole wheat flour to create the gluten along
with 1/4c of Hodgson Mill Vital Wheat Gluten)
3 Tablespoons dry yeast (pour the yeast on top of the flour, not directly into the liquid)
3. Replace whips with bread dough hooks and proceed:
Add 3 cups whole-wheat flour and mix well
Add 1 to 2 more cups whole wheat flour and mix until dough pulls away from the bowl (try not to exceed
a total of 12 c. flour as dough must be soft enough to handle but not too sticky; the softer the better). If
you put too much flour, you can add more liquid to a “hole” in the dough. Knead with bread hooks for 12
minutes.
Pre-heat oven to 350º.
4. Divide dough into 6 parts and put into 6 well-greased (shortening) tall juice cans (your hands will get
goopy), and cover cans with a plastic bag or sheet of waxed paper. Let bread dough rise until double
in bulk (about 20-30 minutes). Bread is crumbly if you let it raise too long.
5. Carefully set cans right side up and center in the oven on the next to lowest rack (this will keep it from
growing into the heating element). Bake for 30 minutes for Texas [and Virginia!] (35-40 for Utah) Do not over bake. I put aluminum foil over them half way through baking to prevent over-browning the tops.
6. Let set 5 minutes. Remove loaves from the cans and lay loaves down on cooling rack for 20 minutes. If
loaves won’t come out of cans, just let them set for a minute or so and they will come out.
7. Seal loaves in plastic bags and store at room temperature or in the freezer. Don’t store loaves in
the refrigerator. Shelf life is about 3-4 days before bread will mold, but keep for several weeks in the
freezer. (I use the mushroom portion for a bowl of bread & milk with a little sprinkle of sugar )
Troubleshooting:
Dough doesn’t get thick and sticky in Step #2: Wheat doesn’t have enough gluten content to make
good bread. The solution is to add some white flour or add 3 Tablespoons of “Dough Enhancer” with
the yeast in step #2.
Bread is too crumbly—Dough rose too much in the pans. It is better to punch the dough down and let
it rise again than to bake it when it rose too high in the first place.
Bread is too dry—Used too much flour, cooked too long, not bagged soon enough after baking.
Doesn’t slice well—dough raised too much. Loaves were too hot. (use a good sharp serrated knife)
Hints/Tips:
1 cup hard white/red wheat = 1.5 c. flour
1 -#10 can ≈ 20 c. flour. (I used 9 c. and remaining flour fit back into the can w/lid)
For most bread recipes the water should be between 110-115º --this recipe doesn’t do that; it is very
hot tap water so you don’t want the yeast to touch the water or it will kill the yeast; Just be sure to add it
on top of the flour in Step #2.
I used 3 c. white flour (to make gluten) when I did step #2
I cover the pans with wax paper while the bread is rising in the cans. While they are cooking I add the
aluminum foil to prevent over- browning.
If you cook this bread in large juice cans it will appear with a mushroom shaped top upon baking. It’s
normal! There’s no crust with this method. You can also use a regular loaf pan; however remember
you want it to fill about 1/3 of it before rising.
The biggest tip is to keep trying. You will figure out what works best as you practice, practice, and
practice some more!
When Lee's parents were here last fall they bought me some cans for bread "pans". I didn't think I had any traditional bread pans, but turns out I did! I like baking the bread in these cans. Funny enough, Lee grew up thinking homemade wheat bread was always round. It's fun to have round bread! I still buy bread for the boys' lunches. Maybe this fall when 4/5ths of my kids are in school they'll be using homemade bread for sandwiches.
Grease your cans well!
My bread also puffs up tall and makes a "mushroom" top. Let them cool upright. If you lay them on a cooling rack one side of your bread will be flat...which is fine too.
Here is my mother-in-law's recipe for whole wheat bread. Also, my sister-in-law Cindy added her changes too. I've used brown sugar and honey. So far I think I like how the honey one turns out better. I use whole wheat flour and have never used wheat gluten. Lee and I like how it turns out. Feel free to play around with the recipe like Cindy has--her comments are in the recipe! It's a good one!
WHOLE WHEAT BREAD –Raema Robertson (Cindy Robertson)
1. In the large BOSCH mixer bowl, using wire whips, mix the following ingredients [I am sure by hand or a Kitchen Aid would work great too!]:
1. In the large BOSCH mixer bowl, using wire whips, mix the following ingredients [I am sure by hand or a Kitchen Aid would work great too!]:
6 cups hot tap water
2/3 cup oil
2 Tablespoons salt
2/3 cup honey (or brown sugar) (I use brown sugar)
2. Add the following and continue mixing until batter thickens and is sticky (about 5-10 min): (I do the full
10 minutes but watch the Bosch as it may jump off the counter –that’s another story)
6 cups whole-wheat flour (I use 3 c. white flour and 3. c. whole wheat flour to create the gluten along
with 1/4c of Hodgson Mill Vital Wheat Gluten)
3 Tablespoons dry yeast (pour the yeast on top of the flour, not directly into the liquid)
3. Replace whips with bread dough hooks and proceed:
Add 3 cups whole-wheat flour and mix well
Add 1 to 2 more cups whole wheat flour and mix until dough pulls away from the bowl (try not to exceed
a total of 12 c. flour as dough must be soft enough to handle but not too sticky; the softer the better). If
you put too much flour, you can add more liquid to a “hole” in the dough. Knead with bread hooks for 12
minutes.
Pre-heat oven to 350º.
4. Divide dough into 6 parts and put into 6 well-greased (shortening) tall juice cans (your hands will get
goopy), and cover cans with a plastic bag or sheet of waxed paper. Let bread dough rise until double
in bulk (about 20-30 minutes). Bread is crumbly if you let it raise too long.
5. Carefully set cans right side up and center in the oven on the next to lowest rack (this will keep it from
growing into the heating element). Bake for 30 minutes for Texas [and Virginia!] (35-40 for Utah) Do not over bake. I put aluminum foil over them half way through baking to prevent over-browning the tops.
6. Let set 5 minutes. Remove loaves from the cans and lay loaves down on cooling rack for 20 minutes. If
loaves won’t come out of cans, just let them set for a minute or so and they will come out.
7. Seal loaves in plastic bags and store at room temperature or in the freezer. Don’t store loaves in
the refrigerator. Shelf life is about 3-4 days before bread will mold, but keep for several weeks in the
freezer. (I use the mushroom portion for a bowl of bread & milk with a little sprinkle of sugar )
Troubleshooting:
Dough doesn’t get thick and sticky in Step #2: Wheat doesn’t have enough gluten content to make
good bread. The solution is to add some white flour or add 3 Tablespoons of “Dough Enhancer” with
the yeast in step #2.
Bread is too crumbly—Dough rose too much in the pans. It is better to punch the dough down and let
it rise again than to bake it when it rose too high in the first place.
Bread is too dry—Used too much flour, cooked too long, not bagged soon enough after baking.
Doesn’t slice well—dough raised too much. Loaves were too hot. (use a good sharp serrated knife)
Hints/Tips:
1 cup hard white/red wheat = 1.5 c. flour
1 -#10 can ≈ 20 c. flour. (I used 9 c. and remaining flour fit back into the can w/lid)
For most bread recipes the water should be between 110-115º --this recipe doesn’t do that; it is very
hot tap water so you don’t want the yeast to touch the water or it will kill the yeast; Just be sure to add it
on top of the flour in Step #2.
I used 3 c. white flour (to make gluten) when I did step #2
I cover the pans with wax paper while the bread is rising in the cans. While they are cooking I add the
aluminum foil to prevent over- browning.
If you cook this bread in large juice cans it will appear with a mushroom shaped top upon baking. It’s
normal! There’s no crust with this method. You can also use a regular loaf pan; however remember
you want it to fill about 1/3 of it before rising.
The biggest tip is to keep trying. You will figure out what works best as you practice, practice, and
practice some more!
Thursday, January 12, 2012
Snowman Craft
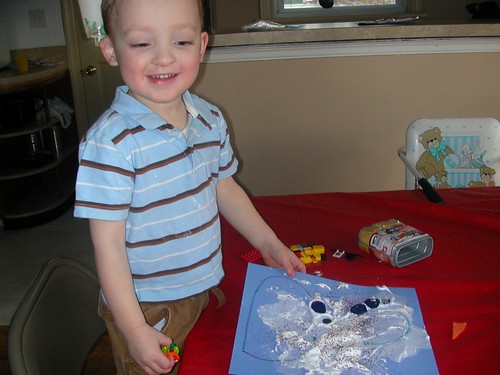
Once a week I check up with the 1st grade teachers here at the local elementary school to see if there are any craft projects they would like me to help out with. A few weeks ago one teacher had me prep some construction paper for snowmen by drawing a snowman outline on each one. She then told me that she was going to make "snow" by mixing shaving cream and glue. While the mixture is still wet, one can add buttons, eyes, nose, etc. Because the glue is in the mixture it will harden (to an extent) and dry. I thought this sounded fun and wanted to try it with my girls.
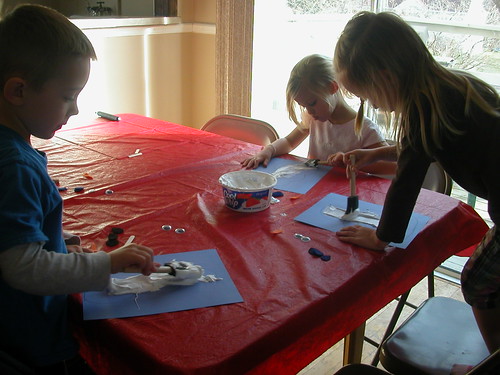
We did just that today. My nephew was in town and I thought he would enjoy it too. To make the "snow" mix two parts shaving cream and one part glue.
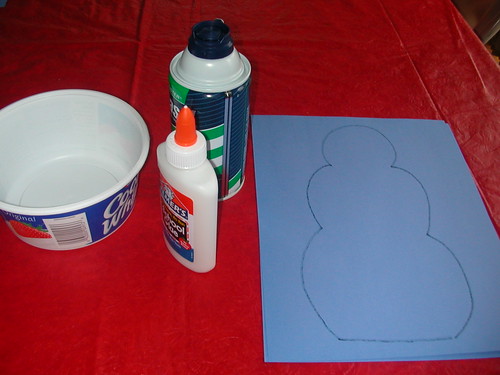
Gather items to decorate your snowman. At school Cal used buttons and pompoms. I used what we had at home.

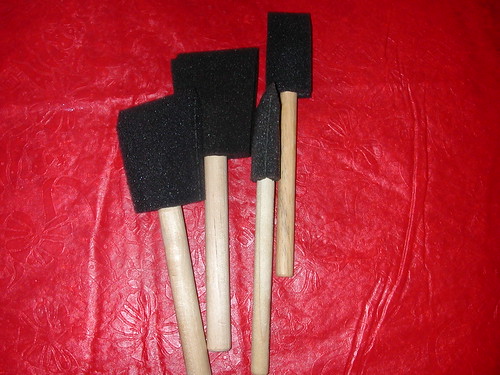
I did make a special purchase...some foam brushes. There was only one brush at home and I think it was destroyed in its last use. It was a gorgeous day today (high 50s) so the kids and I took a walk to the local ACE Hardware. I love that I can walk to so many businesses here in my small town!
I made too much mixture for four kids. I added about 3/4 a bottle of Elmer's glue in it. I am sure my ratio of 2 to 1 was off, but I think it still worked.

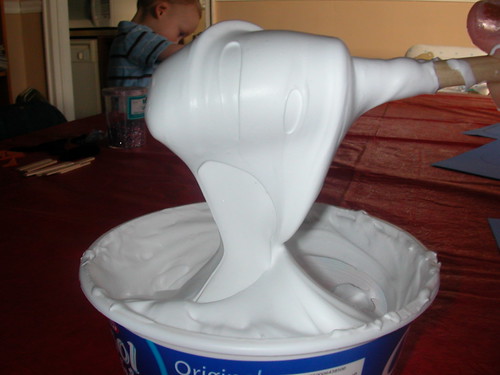
As I mixed the glue and shaving cream together it became somewhat elastic.
Now to create!

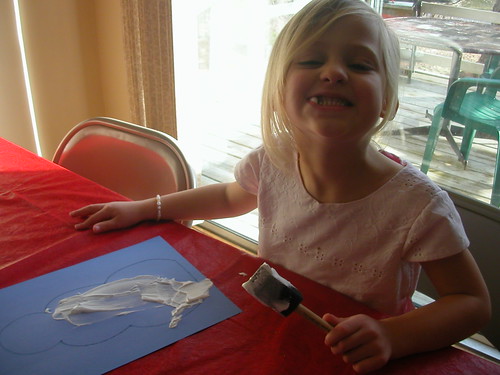

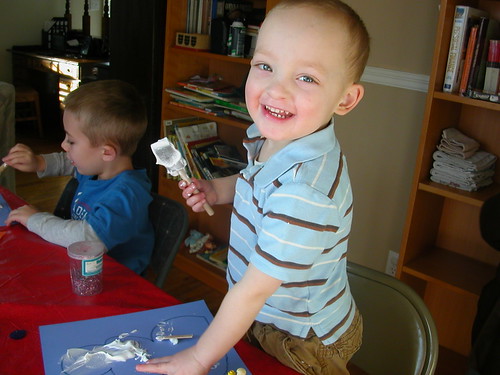



Showing off the finished product...

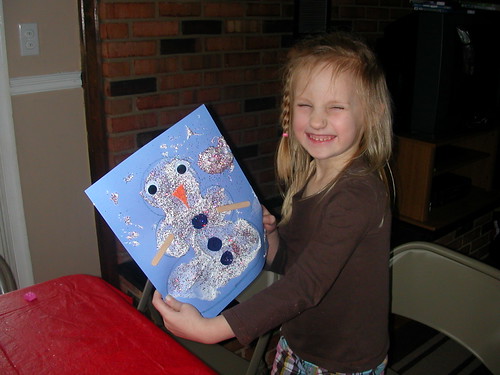
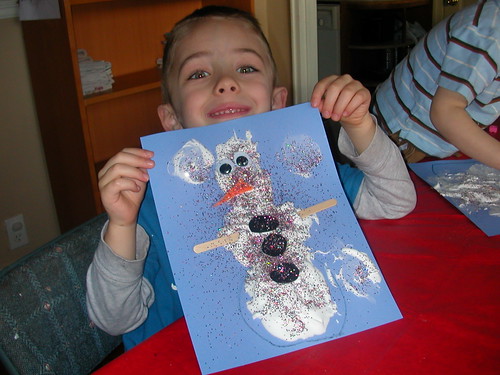
What winter crafts have you been making? We'd love to hear! Happy New Year!
We did just that today. My nephew was in town and I thought he would enjoy it too. To make the "snow" mix two parts shaving cream and one part glue.
Gather items to decorate your snowman. At school Cal used buttons and pompoms. I used what we had at home.
I did make a special purchase...some foam brushes. There was only one brush at home and I think it was destroyed in its last use. It was a gorgeous day today (high 50s) so the kids and I took a walk to the local ACE Hardware. I love that I can walk to so many businesses here in my small town!
I made too much mixture for four kids. I added about 3/4 a bottle of Elmer's glue in it. I am sure my ratio of 2 to 1 was off, but I think it still worked.
As I mixed the glue and shaving cream together it became somewhat elastic.
Now to create!
Showing off the finished product...
What winter crafts have you been making? We'd love to hear! Happy New Year!
Tuesday, January 3, 2012
The White Dove
CLN Bookscope invited my mom to share the creation process of her book The White Dove. Check it out!
I'm proud of you mom and can't wait for the sequel!

Tuesday, December 20, 2011
Christmas Stockings, a picture tutorial
Traditions abound at Christmas time. I enjoy participating in the same activities year after year. There are things we all look forward to every holiday season. Lee quoted it best with the humorous statement someone said or wrote: "We don't have traditions. We just do the same things year after year." Okay, well it's funny to me. Stockings have become part of our tradition. I am pretty sure I had the same stocking for several years growing up, but then it was lost or ruined or something...ever left a forgotten orange in a stocking for several months?!
Lee's family all have the same stockings. During my second Christmas with Lee we were at his parents' home and his mom gave me all the materials to make a stocking. Soon thereafter she sent me a supply of beads and felt she was no longer using. After making mine, I made stockings for all of my other kids, except Clark. His stocking was his great-grandfather's. Lee's mom replaced Grandpa Hibbard's name with Clark's--what a great keepsake! Though Elden is the last child, I have kept making stockings. They do take time, but they are fairly inexpensive.
On to the tutorial. Here is a list of supplies you'll need:
Felt, various colors
Needle & Thread
Bells
Pinking Shears
Beads
Sequins
Glue, such as Tacky Glue
Glitter
Cut a stocking out of felt. I do red, but pick any color you want. You'll have to buy more than just the craft sheets of felt for the stocking. Cut it about 1/4 inch bigger on the edges. You'll be sewing and trimming it later.
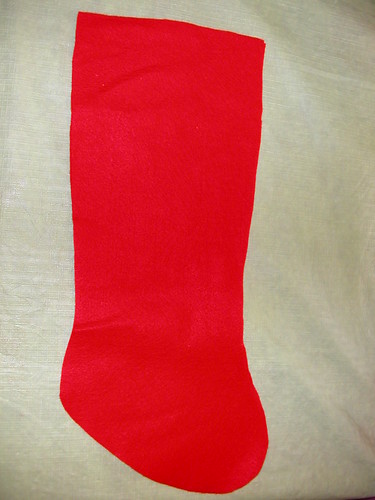
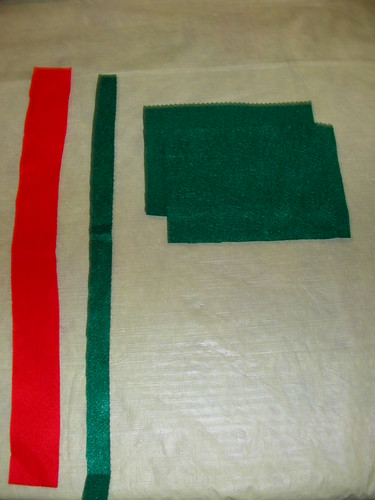
You'll need these pieces too. Oh and felt irons out quite nicely. Just use a low iron. If you need to iron it after you sew on the decorations, just flip it over and iron the back.
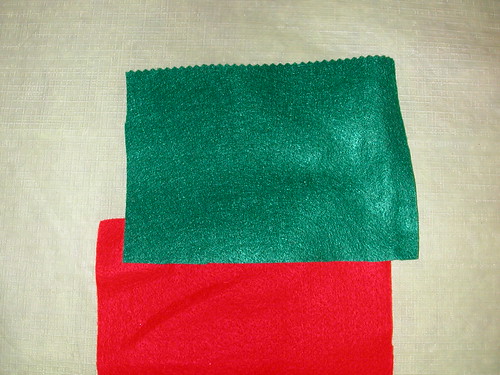
You don't have to make the stocking part very "tall" because you'll add a green top to it.
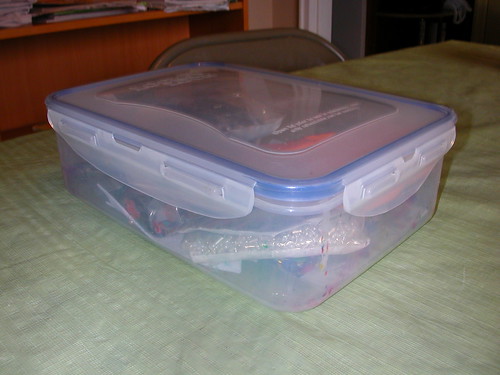
Next, you'll need some thread, a needle and some accessories! This is my stocking box.
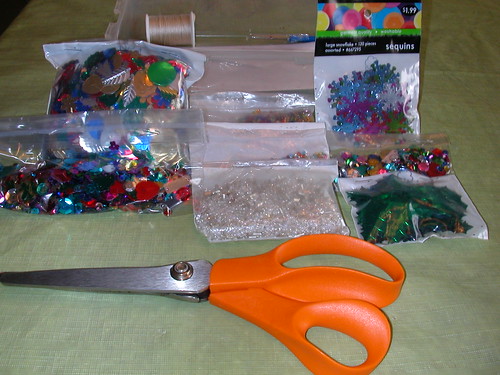
Many of these beads and sequins I got from Lee's mom. Every year I put them back in the same bag and re-staple it. If you shop at Michael's or Hobby Lobby you can always get 40% off coupons, of course making the beads and such very cheap! Oh, if you want the jagged edge, you'll need a pair of pinking shears. I bought them specially for stockings and I think I use them only on the stockings. I was happy with the purchase though!
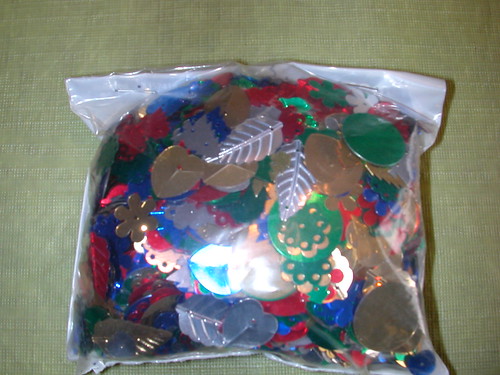
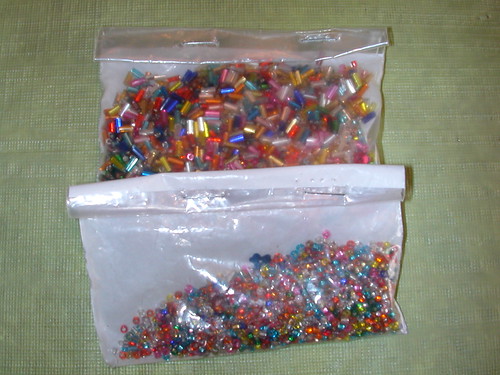
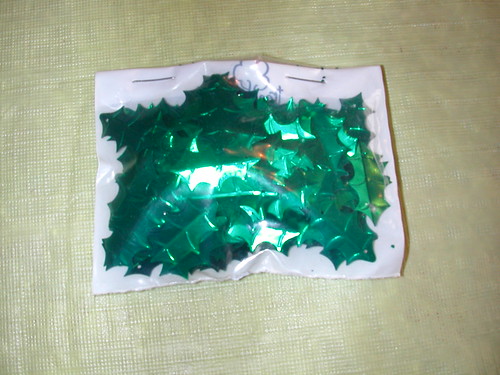
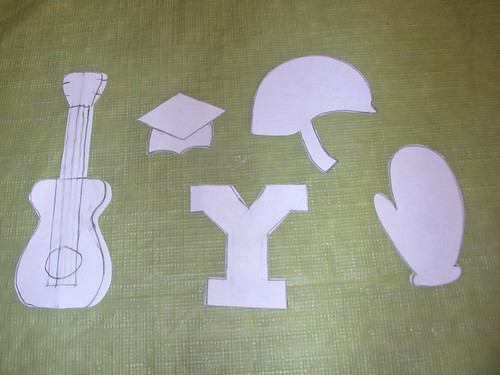
When I make these stockings I like to break up the process. Unless you have a whole day solo, don't anticipate getting these done in one sitting. After I cut out the stockings, I cut out the personalized felt pieces. Sometimes I hand cut them, but other I make a paper pattern first.
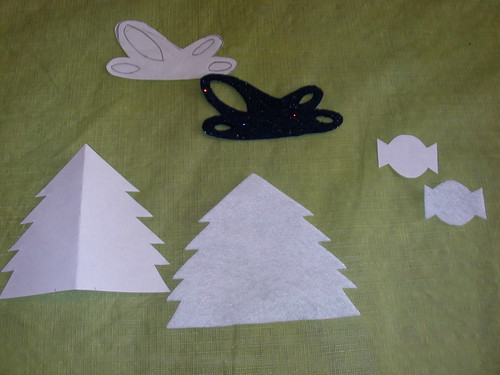
I finally decided to keep most of the little patterns I made. Maybe I can use them again?
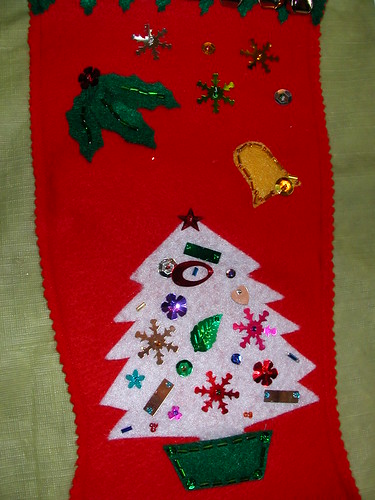
Next I sew on all of the felt decorations.

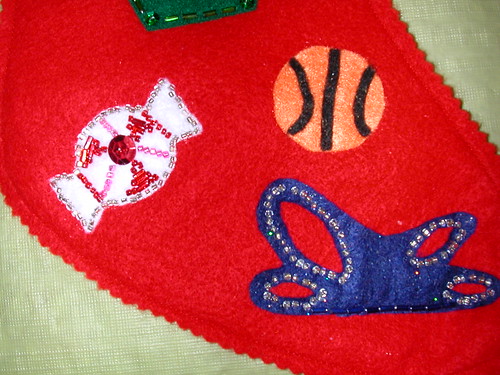
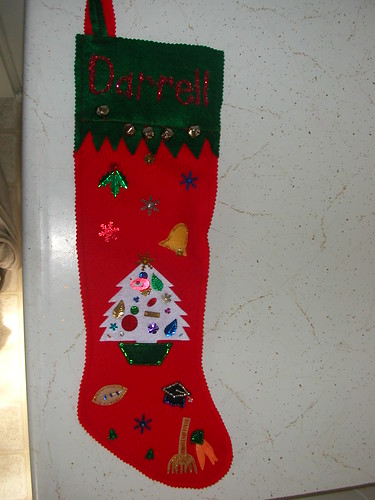
Usually by the foot of the stocking is where I personalize it. It's tricky to personalize a baby's stocking, but Elden sure likes candy and balls!
Next is sewing. First I cut the pointed edges on the bottom of the green top. There are two green tops, a front and a back, so make sure to cut both. Then sew one green top to the front of the stocking, and then sew a green top to the back of the stocking. Line up the front and the back, pin, and sew all the way around. Trim closely with pinking shears (be careful to not get too close!). If the initial stitching of sewing the green top onto the stocking over laps the stitching of the outside of the stocking, you can unpick the overlap if you want. I've done it before.
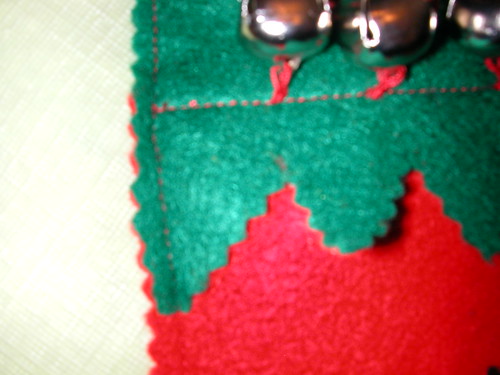
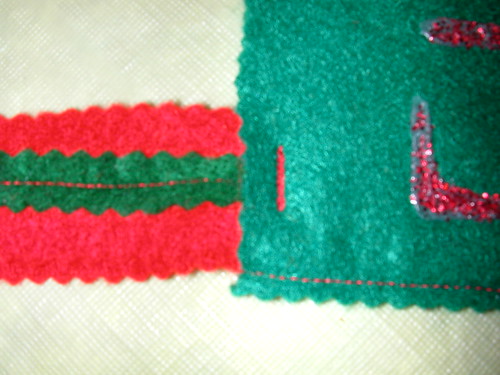
Next trim the skinny red strip and the green strip with pinking shears. Then sew the green on top of the red.
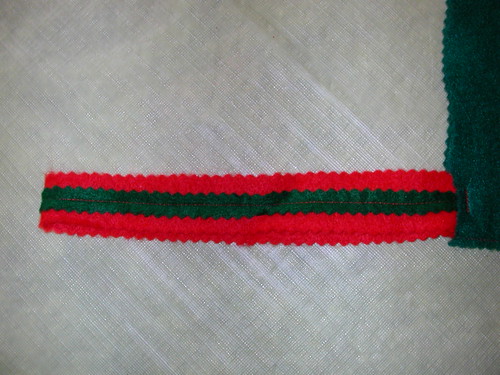
Then attach to the stocking. After that sew on the bells--double up on the thread. My new bells have cut through the thread and I've had to re-sew some. Last step, write the name in glue and then sprinkle with glitter. Let the glitter dry completely. I actually haven't had the best of luck with tacky glue, but I keep using it. It spreads out and flattens when I use it. You could use a hot glue too...maybe do a letter at a time?
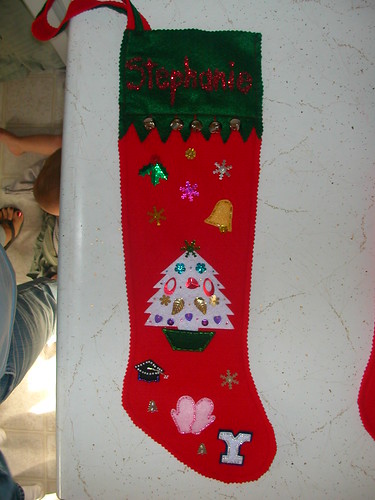
Last Christmas I made my parents and my sister Stephanie and her husband Andy stockings.
My dad loves gardening...hence the rake type thing and the carrots, loves football and has his PhD in Food Science thus the grad hat.
My mom likes chocolate and candy and published a great young adult novel with Houghton Mifflin, The White Dove. I tried to re-create the book. She also likes horses and had one when she was younger, so you could say that is why there is a sleigh...

Andy loves music and play the guitar, is currently attending law school, and goes to BYU.

Stephanie loves clothes--thus the gloves, is getting her Master's degree in Food Science and also attends BYU.
I finished Sheldon's stocking a couple of weeks ago.

Sheldon attends BYU-Idaho and is in the National Guard. Don't you love the bling on the kevlar helmet?

Here are all of our stockings...sorry you can't see the details! It was hard to get a photo with all of them in.

My parents' and Sheldon's stockings.

Whatever you create with stockings have fun with them! It's a fun piece to pull out year after year and enjoy during the holidays. Merry Christmas!
Lee's family all have the same stockings. During my second Christmas with Lee we were at his parents' home and his mom gave me all the materials to make a stocking. Soon thereafter she sent me a supply of beads and felt she was no longer using. After making mine, I made stockings for all of my other kids, except Clark. His stocking was his great-grandfather's. Lee's mom replaced Grandpa Hibbard's name with Clark's--what a great keepsake! Though Elden is the last child, I have kept making stockings. They do take time, but they are fairly inexpensive.
On to the tutorial. Here is a list of supplies you'll need:
Felt, various colors
Needle & Thread
Bells
Pinking Shears
Beads
Sequins
Glue, such as Tacky Glue
Glitter
Cut a stocking out of felt. I do red, but pick any color you want. You'll have to buy more than just the craft sheets of felt for the stocking. Cut it about 1/4 inch bigger on the edges. You'll be sewing and trimming it later.
You'll need these pieces too. Oh and felt irons out quite nicely. Just use a low iron. If you need to iron it after you sew on the decorations, just flip it over and iron the back.
You don't have to make the stocking part very "tall" because you'll add a green top to it.
Next, you'll need some thread, a needle and some accessories! This is my stocking box.
Many of these beads and sequins I got from Lee's mom. Every year I put them back in the same bag and re-staple it. If you shop at Michael's or Hobby Lobby you can always get 40% off coupons, of course making the beads and such very cheap! Oh, if you want the jagged edge, you'll need a pair of pinking shears. I bought them specially for stockings and I think I use them only on the stockings. I was happy with the purchase though!
When I make these stockings I like to break up the process. Unless you have a whole day solo, don't anticipate getting these done in one sitting. After I cut out the stockings, I cut out the personalized felt pieces. Sometimes I hand cut them, but other I make a paper pattern first.
I finally decided to keep most of the little patterns I made. Maybe I can use them again?
Next I sew on all of the felt decorations.
Usually by the foot of the stocking is where I personalize it. It's tricky to personalize a baby's stocking, but Elden sure likes candy and balls!
Next is sewing. First I cut the pointed edges on the bottom of the green top. There are two green tops, a front and a back, so make sure to cut both. Then sew one green top to the front of the stocking, and then sew a green top to the back of the stocking. Line up the front and the back, pin, and sew all the way around. Trim closely with pinking shears (be careful to not get too close!). If the initial stitching of sewing the green top onto the stocking over laps the stitching of the outside of the stocking, you can unpick the overlap if you want. I've done it before.
Next trim the skinny red strip and the green strip with pinking shears. Then sew the green on top of the red.
Then attach to the stocking. After that sew on the bells--double up on the thread. My new bells have cut through the thread and I've had to re-sew some. Last step, write the name in glue and then sprinkle with glitter. Let the glitter dry completely. I actually haven't had the best of luck with tacky glue, but I keep using it. It spreads out and flattens when I use it. You could use a hot glue too...maybe do a letter at a time?
Last Christmas I made my parents and my sister Stephanie and her husband Andy stockings.
My dad loves gardening...hence the rake type thing and the carrots, loves football and has his PhD in Food Science thus the grad hat.
My mom likes chocolate and candy and published a great young adult novel with Houghton Mifflin, The White Dove. I tried to re-create the book. She also likes horses and had one when she was younger, so you could say that is why there is a sleigh...
Andy loves music and play the guitar, is currently attending law school, and goes to BYU.
Stephanie loves clothes--thus the gloves, is getting her Master's degree in Food Science and also attends BYU.
I finished Sheldon's stocking a couple of weeks ago.
Sheldon attends BYU-Idaho and is in the National Guard. Don't you love the bling on the kevlar helmet?
Here are all of our stockings...sorry you can't see the details! It was hard to get a photo with all of them in.
My parents' and Sheldon's stockings.
Whatever you create with stockings have fun with them! It's a fun piece to pull out year after year and enjoy during the holidays. Merry Christmas!
Friday, December 16, 2011
Christmas Purses
Last Christmastime in 2010 I made these skirts for the girls. I mistakenly made them too big, but thankfully they yet again fit them (perfectly) this Christmas!
Haley and Shanna Christmas of 2010

I bought this purse for the girls' (they each got one) birthday in May. We got them a mini Book of Mormon to put in the purse, thus becoming their little Sunday bag. Well, blue doesn't really go with their Christmas skirts.
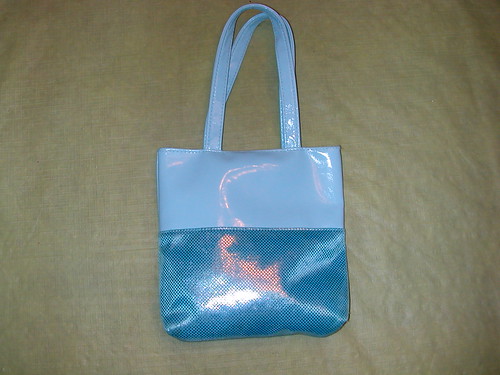
Bear with me, I am not a good writer...but I think the pictures will tell the tale. The purses were only $1 at Target so I actually bought four of them. I figured if my girls lost one then I could have a back-up. Amazingly they haven't lost their purses. So I took one of them and ripped it apart with my seam ripper. I figured I could use it as a pattern. When it comes to fabric I am more of a pattern person. That isn't necessarily true with cooking, but it sure is with fabric.
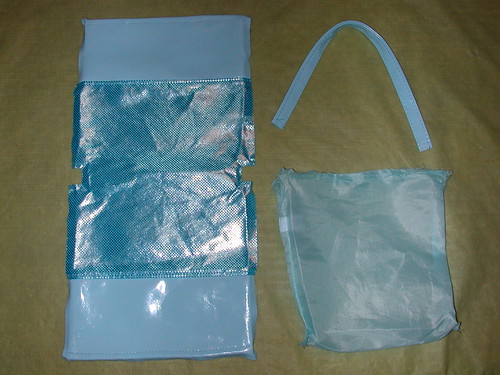
If you don't have a purse to rip apart, here is the basic pattern that you want...a rectangle with a square, rectangle thingy cut out of the middle edge. I used fabric that I had on hand. This fabric is from my high school choralier skirt. I cut of these shapes out of the black fabric. Cut two. I had a lot of interfacing (I bought too much one time) and ironed some interfacing on one of the black pieces (outer shell) of the purse.

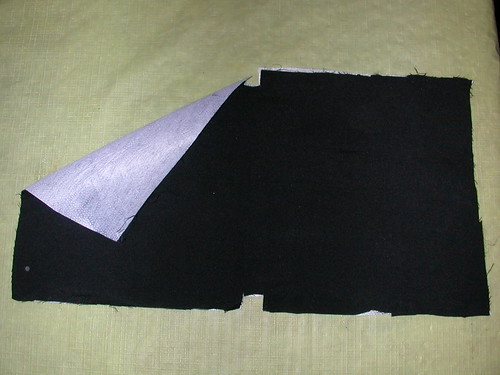
Fold the piece of fabric in half, with right-sides together and stitch up the sides--don't stitch the little hole that is created. The corner will look like a right angle....or a resemblance of one as my picture tells. Right here I have just sewn my lining. Oh and as you can tell the seam isn't very wide. I am not sure how wide it is, but it is narrow. You can make it wider if you want. Just sew the same seam width on all pieces.
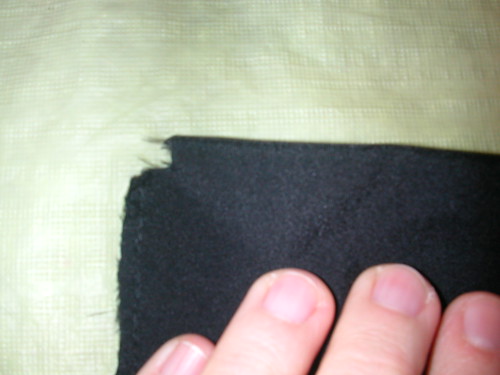
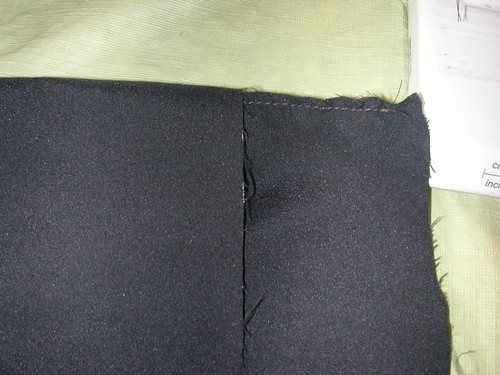
Next, where the hole in the fabric is, make it into a triangle...or a volcano where the hole is at the top and the seam is in the center of it. Lay it flat. Sorry my picture is kind of crooked of the top of my "volcano". Then stitch up the hole. The stitching of the hole should be perpendicular to the stitching of the seam sewn previously. Yet again, a picture of the lining. Sorry...does this make sense? I think once you do it you'll see what I mean.
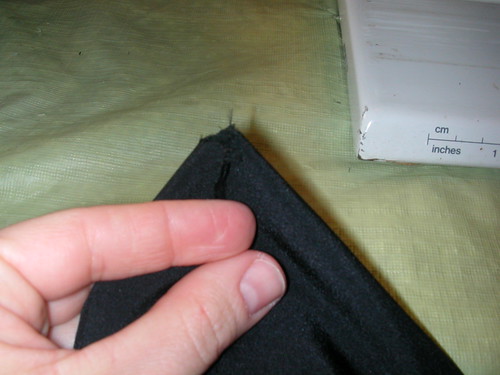
And voila! You get a nice stitch for the bottom of the bag. This is actually a picture of the outer shell, not the lining. But you do the same stitching on both pieces.

Before you sew the outer shell and the lining together stitch on any other things you want on the outside of the purse, like a fabric flower.

So now you have the outer shell and the lining. Time to sew them together!
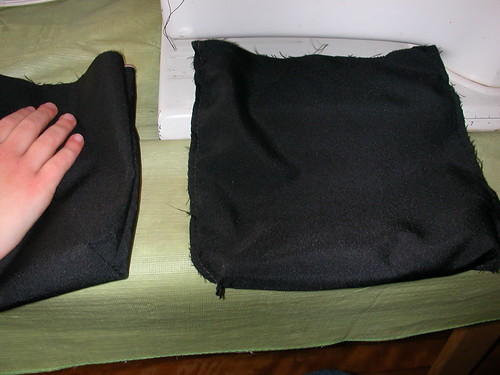
Make sure the outer shell is turned right-side out and that the lining is wrong-side out.
Now you need a break. Here are some random pictures that Shanna took. She managed some good lighting!

Okay, so I forgot to tell you about the handles. I had a fake satin belt for one of my formals that I never wear any more and I used the belt for the handles. I used the blue handle to determine the length of the handle for the purse. The belt was about 1 1/2 inches wide. I folded it in half and did stitching down both sides--so basically it was a piece of fabric folded in half, and then folded in half again.
Pin the lining and the outer shell together, folding the edges into the center....see below.

You're ready to sew!

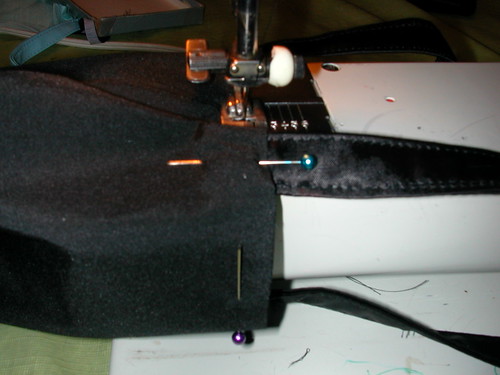
I found while sewing that it's better to pin the handle likes this instead of perpendicular.
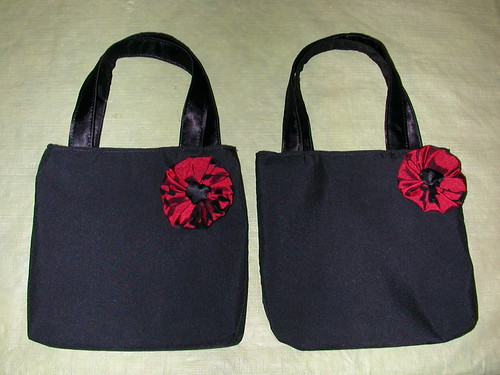
And you're done! Okay, maybe a few hours later.... I am excited to make some other purses for the girls, now that I know how to make them!
Now they have purses to match their Sunday Christmas outfits!
Haley and Shanna Christmas of 2010
I bought this purse for the girls' (they each got one) birthday in May. We got them a mini Book of Mormon to put in the purse, thus becoming their little Sunday bag. Well, blue doesn't really go with their Christmas skirts.
Bear with me, I am not a good writer...but I think the pictures will tell the tale. The purses were only $1 at Target so I actually bought four of them. I figured if my girls lost one then I could have a back-up. Amazingly they haven't lost their purses. So I took one of them and ripped it apart with my seam ripper. I figured I could use it as a pattern. When it comes to fabric I am more of a pattern person. That isn't necessarily true with cooking, but it sure is with fabric.
If you don't have a purse to rip apart, here is the basic pattern that you want...a rectangle with a square, rectangle thingy cut out of the middle edge. I used fabric that I had on hand. This fabric is from my high school choralier skirt. I cut of these shapes out of the black fabric. Cut two. I had a lot of interfacing (I bought too much one time) and ironed some interfacing on one of the black pieces (outer shell) of the purse.
Fold the piece of fabric in half, with right-sides together and stitch up the sides--don't stitch the little hole that is created. The corner will look like a right angle....or a resemblance of one as my picture tells. Right here I have just sewn my lining. Oh and as you can tell the seam isn't very wide. I am not sure how wide it is, but it is narrow. You can make it wider if you want. Just sew the same seam width on all pieces.
Next, where the hole in the fabric is, make it into a triangle...or a volcano where the hole is at the top and the seam is in the center of it. Lay it flat. Sorry my picture is kind of crooked of the top of my "volcano". Then stitch up the hole. The stitching of the hole should be perpendicular to the stitching of the seam sewn previously. Yet again, a picture of the lining. Sorry...does this make sense? I think once you do it you'll see what I mean.
And voila! You get a nice stitch for the bottom of the bag. This is actually a picture of the outer shell, not the lining. But you do the same stitching on both pieces.
Before you sew the outer shell and the lining together stitch on any other things you want on the outside of the purse, like a fabric flower.
So now you have the outer shell and the lining. Time to sew them together!
Make sure the outer shell is turned right-side out and that the lining is wrong-side out.
Now you need a break. Here are some random pictures that Shanna took. She managed some good lighting!
Okay, so I forgot to tell you about the handles. I had a fake satin belt for one of my formals that I never wear any more and I used the belt for the handles. I used the blue handle to determine the length of the handle for the purse. The belt was about 1 1/2 inches wide. I folded it in half and did stitching down both sides--so basically it was a piece of fabric folded in half, and then folded in half again.
Pin the lining and the outer shell together, folding the edges into the center....see below.
You're ready to sew!
I found while sewing that it's better to pin the handle likes this instead of perpendicular.
And you're done! Okay, maybe a few hours later.... I am excited to make some other purses for the girls, now that I know how to make them!
Now they have purses to match their Sunday Christmas outfits!
Subscribe to:
Posts (Atom)