Tuesday, March 15, 2011

St. Pat's is Comin'

It's time to pull out a bit 'o green to wear. Or you just might get pinched.

Little leprechauns try to pull off shenanigans in our kitchen each year. Our milk always seems to turn green on March 17, and last year even the eggs were green.

Breakfast Burrito with Green Eggs and Ham, and green milk.

A couple years ago we made some traps to catch the little blighters, but they've always managed to escape. We loved the ideas in Family Fun on how to make Leprechaun Traps. The kids liked it so much they made traps again last year, all on their own. As good as the traps were, the kids failed once again to catch those tricksters.


The leprechaun left little notes on the traps

and gold-wrapped candy on their pillows.


He also left some clues around our house and yard to help us find a yummy treasure!


With all the fun headed your way, you might want to pull out your crock pot and throw together cozy Irish Stew that can cook all day and be ready when you are. A crusty loaf of Irish Soda Bread goes well with this stew. Soda breads are simple to make and don't require bread pans to bake! Just form a round loaf with your dough on a baking sheet and pop it in the oven and bake according to the recipe.

End your meal with light and airy Shamrock Cookies.

Shamrock Cookies
3 egg whites (have eggs at room temperature for better peaks when mixing)
1/4 teaspoon cream of tartar
Pinch salt
1 cup sugar
1 teaspoon vanilla extract
Green food coloring (optional)

Directions:
1. In a mixing bowl, beat egg whites until foamy. Sprinkle with cream of tartar and salt; beat until soft peaks form. Gradually add sugar and vanilla, beating until stiff peaks form, about 5-8 minutes. If desired, fold in green food coloring.
2. Spoon mixture into a plastic zip-top bag. Twist the bag to push the mixture to one side and snip off a corner of the bag. Pipe shamrock shapes onto a parchment-lined baking sheet. Bake at 275 degrees F for 20 minutes or until firm to the touch. Immediately remove to a wire rack to cool. Store in an airtight container.

Happy St. Patrick's Day!!!

Friday, March 11, 2011

My Favorite Pizza and Sauce Recipes

A couple of years ago I was given the best thin-crust pizza dough recipe ever, by my friend Cambria, and I want to share it with you.  I know that 500 degrees (F) sounds like a lot, but it really does make a nice, just right, crisp crust--especially when you bake it on a wire mesh pan (It works well on a cookie sheet too).  You can get these from restaurant supply stores.  I have a  couple of big ones, and also 4 small individual ones as well.  I do omit the garlic salt, since I have plenty of salt and garlic in my sauce.  Make sure if you do use the mesh wire pizza pans not to press anything too hard on it after you place the rolled dough onto your  pan.  The first time I made it, I did that and it was awful trying to get the dough scrubbed out of the holes.  When I have time, I will also roll out a bunch of pizza dough to the right size on tinfoil, wrap it up, freeze it, and then pull it out right before I want to use it.  It makes it a super fast way to make homemade pizza in a hurry.

Cambria's Pizza Dough Recipe
1 cup Warm Water
1 Tbsp. Quick Rise Yeast
1 tsp. Sugar
1 tsp. Salt
2 1/2 cups flour

Mix together first 3 ingredients until yeast is dissolved.  Add remaining ingredients--mix.  Roll out dough.  Assemble pizza (see below) Bake at 500 deg. for 7 min. or until cheese is slightly brown.

Pizza Assembly
Roll out dough and place on pizza pan, preferably mesh wire for crispy crust on bottom.  Drizzle and spread around olive oil, about 2 Tbsp.  Can use hand, pastry brush or paper towel to evenly coat until shiny.  Lightly sprinkle garlic salt making a thin, even coat--a heavier sprinkle may make it too garlicky.  Add sauce.  Add bottom toppings--Onions, mushrooms, and any other toppings that may slide off the top easily or may need the extra heat to cook.  Add cheese.  Add top toppings--Green pepper, olives, pepperoni, sausage, ham, pineapple, etc.


Now, for my sauce recipe.  I have been making this for years, and I can make a pizza or marinara sauce for about fifty-cents.  I like to use tomato paste.  A 1 to 2 ratio works well.  I can of paste and 2 cans of water.   I will also add the olive oil directly to the sauce instead of spreading it on top--this is one of the things that gives pizza such a yummy flavor.  I had tried for years to find the perfect recipe that would taste like I wanted it to in my head--and I am convinced that it was the olive oil.  Also, adding the sugar takes away the metallic after taste you can get with tomato sauces you make.


Deborah's Marinara Sauce
1 can of Tomato paste -8 oz.
2 cans of Water
1 Tbsp. Olive Oil
3/4 tsp. Salt
1 Tbsp. Parsley
1 tsp. Oregano
1 1/2 tsp. Powdered Garlic
1 Tbsp. Diced Garlic
1/4 cup Parmesan Cheese 
1 1/2 tsp. Sugar
1/4 tsp. Fresh Ground Pepper

Mix together until smooth.  Spread on top of dough or use with pasta.

 I hope that your family enjoys this Fun Friday Meal!


~Homemaker
 

Healthy 30 Minute Recipe


One of my favorite places to get recipes is the Mayo Clinic Healthy Recipe website. I love the recipe below, it has some of my favorite ingredients like mushrooms, red peppers, garlic, butter, and of course olive oil :) It also only takes about 30 minutes to make. I do have a couple of changes to the recipe: I saute
the garlic and onion in the olive oil first then add all of the raw vegetables to that pan and let them steam for a couple of minutes. Also, when I am making the sauce I will add between 1 or 2 tablespoons of flour so it will thicken, if I don't do that my sauce always turns out runny.

-Olive Oil

Pasta primavera


Dietitian's tip:Traditional pasta primavera includes pasta topped with sauteed vegetables in a heavy cream sauce with butter. This lighter version is much lower in calories, fat and sodium, and is fresher tasting. It isn't intended to be saucy like its traditional counterpart.

By Mayo Clinic staff
Serves 6

Ingredients

    • 2 cups broccoli florets
    • 1 cup sliced mushrooms
    • 1 cup sliced zucchini or yellow squash
    • 2 cups sliced red or green peppers
    • 1 tablespoon extra-virgin olive oil
    • 1/2 cup chopped onion
    • 2 garlic cloves, minced
    • 1 teaspoon butter
    • 1 cup evaporated fat-free milk
    • 3/4 cup freshly grated Parmesan cheese
    • 12 ounces whole-wheat pasta (angel hair or spaghetti)
    • 1/3 cup finely chopped fresh parsley

Directions

In a large pot fitted with a steamer basket, bring about 1 inch of water to boil. Add the broccoli, mushrooms, zucchini and peppers. Cover and steam until tender-crisp, about 10 minutes. Remove from the pot. In large saucepan, heat the olive oil and saute the onion and garlic over medium heat. Add the steamed vegetables and stir or shake to coat the vegetables with the onion and garlic mixture. Remove from heat but keep warm. In another large saucepan, heat the butter, evaporated milk and Parmesan cheese. Stir over moderate heat until somewhat thickened and heated through. Stir continuously and don't scald. Remove from heat but keep warm. In the meantime, fill a large pot 3/4 full with water and bring to a boil. Add the pasta and cook until al dente (tender), about 10 to 12 minutes, or according to package directions. Drain the pasta thoroughly. Divide the pasta evenly among individual plates. Top with vegetables and pour the sauce over the vegetables and pasta. Garnish with fresh parsley and serve immediately.

Nutritional Analysis

(per serving)
Calories350Cholesterol12 mg
Protein17 gSodium224 mg
Carbohydrate55 gFiber7 g
Total fat7 gPotassium522 mg
Saturated fat3 gCalcium280 mg
Monounsaturated fat3 g

Wednesday, March 9, 2011

Box Re-do

Hello again! I took some pictures of my projects finally. :) So today I'm going to show you a box re-do.

I had gotten several of these Ikea boxes. I love how cheap they are, but while they don't look bad - they don't look very good either. So I decided to glam them up a bit.
I had read several times about how you could use heat n bond (or fusible interfacing) to iron fabric decals on walls, without leaving any sort of mark. I figured if it works on walls, why not cardboard.

So I took my Heat n Bond (I got a 5 yard roll at Michael's for like $5 with a 40% off coupon) and some Ikea fabric....
(Sorry for the lack of pictures here...) Then I unscrewed the box and laid it flat. I cut out a piece of fabric that just a bit bigger than the box. Next I ironed the Heat n Bond onto the fabric and then ironed the fabric/Heat n Bond combo onto the box. Finally I put the box back together. And this is the end result...


I thought they turned out really nice! They only took about a half an hour a box. The hardest part was getting the screws to screw back in - I had to get my husband to help me with that.

As you can tell - I didn't cover the lids with fabric. It seemed like it would be a big pain and I didn't even want to try. So I just ended up throwing the lids away.
I did three of them and put them in our entrainment center to store DVDs, remotes, Wii games and controllers, and even our little DVD player. (Don't you love our "flat" screen tv?) :)
Let me know if you have any questions - it really was super easy and I loved how it turned out!

Tuesday, March 8, 2011

For next year...or another holiday

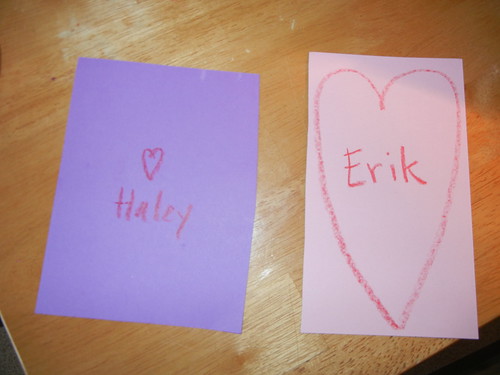
I've seen this idea online and decided to use it for my girls' preschool Valentines.

I cut pieces of card stock and traced my design
DSCN0086

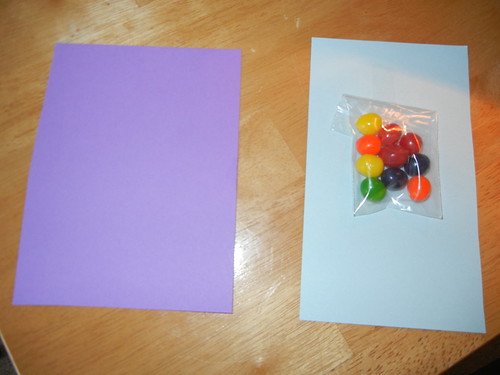
The back of the pink paper is blue...
DSCN0087

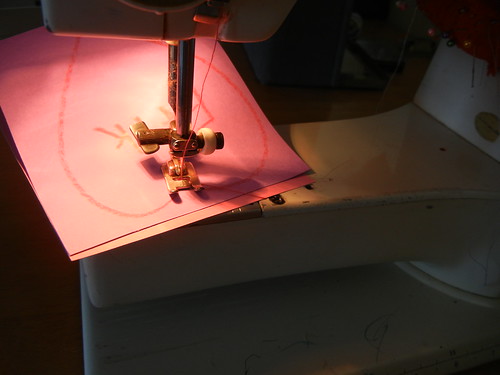
Stitch the heart together using the outline of the heart as a guide
DSCN0091

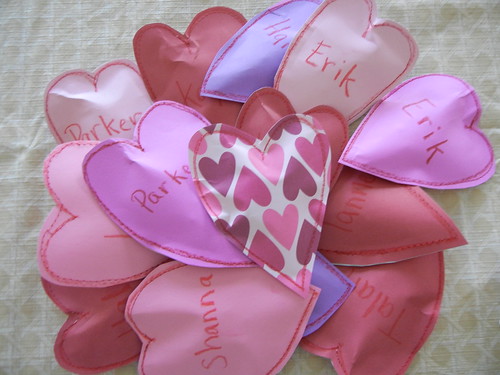
A pile of hearts for all! You could also cut out clovers or Easter egg shapes to use for the upcoming holidays! 
DSCN0095

~Ramen Queen

Saturday, March 5, 2011

Easy Chocolate Coconut Candy

I enjoy making easy candy, and you can't go wrong with coconut and chocolate!  My mother-in-law gave me this recipe.  Here's what you'll need:

3/4 cup light corn syrup
1 bag flaked coconut, 14 ounce
1 package semi-sweet chocolate chips, 12 ounce
2 tablespoons shortening

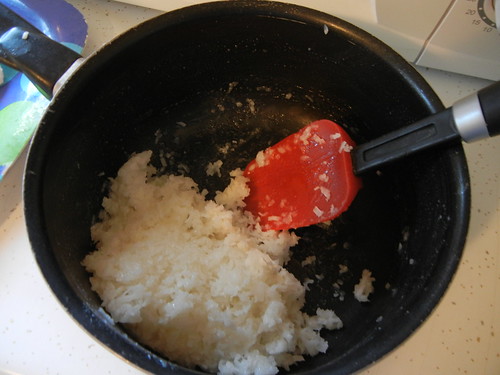
Bring the corn syrup to a boil.  Remove from heat and stir in the coconut.  Let cool till you can handle the candy.  I put the whole pan in the fridge for an hour or so. (I am sure it would be fine after a half hour too).
Feb 28, 2011

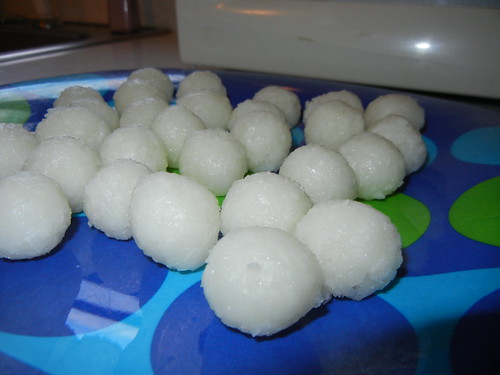
Form into balls (or whatever shape you desire!)
Feb 28, 2011 (2)

After balls are formed, melt the chocolate and shortening together in a bowl.  You can melt the chocolate over a double boiler, but I just melt it in the microwave, stirring and checking it often.  I put it in for about 30 seconds, stir, then put it in for about 20 seconds then stir.  Microwaves are different, so if you aren't sure, just check the mixture about every 10 seconds. If you do use a double boiler make sure you don't get water into the chocolate.

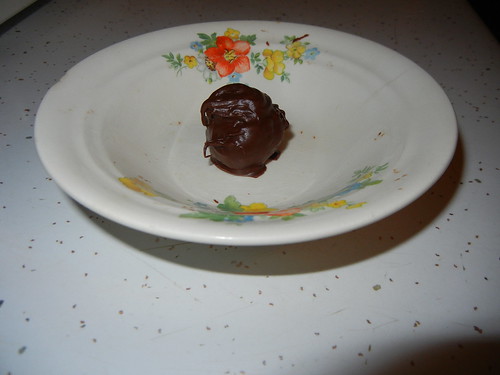
Dip the balls into the chocolate.  I use a fork to assist in the dipping process.  Here is the lone survivor.  I had some leftover chocolate, so I added an extra dollop on top. I love this recipe and need to make it more often!
Feb 28, 2011 (4)

I made these the other day for a thank-you to a friend who showed me how to make no-knead artisan bread. And just a little side note...the above dish came in a laundry box way back when.  When my grandma Ruth was growing up you could buy products that had dishes in them---like a cute little bowl in a box of detergent.  Same idea as getting toys in cereal boxes.

~Ramen Queen

Friday, March 4, 2011

Thirty Minute Meal

I love to make quick recipes. So here is a quick post on one of my favorite 30 min recipes.


Mama's Best Broiled Tomato Sandwich
INGREDIENTS:
2 tablespoons olive oil
2 tablespoons balsamic vinegar
4 ripe tomatoes, sliced
3 tablespoons mayonnaise
1/2 teaspoon dried parsley
1/4 teaspoon dried oregano
1/4 teaspoon black pepper
3 tablespoons grated Parmesan cheese,
divided
4 slices bread, lightly toasted
DIRECTIONS:
1.Preheat oven to broil.
2.In a shallow bowl, whisk together the olive oil and vinegar. Marinate the tomatoes in the mixture, stirring occasionally.
3.Meanwhile, in a small bowl, combine mayonnaise, parsley, oregano, black pepper and 4 teaspoons Parmesan cheese. Spread mixture on each slice of toasted bread. Place marinated tomatoes on 2 slices and sprinkle with remaining Parmesan cheese.
4.Place on a baking sheet and broil for 5 minutes, or until cheese turns golden brown. Serve immediately, open faced or closed.

The recipe is from allrecipes.com

-Olive Oil

Thursday, March 3, 2011

Budget Extreme

Way to go Ramen Queen on your February food budget! February was a crazy month for us as far as groceries were concerned. I didn't make it to the grocery store except for a couple of quick trips. Part of the reason was I was out of town a couple of times, and super busy the rest of the time. By the time I did get to the store at the end of the month, I had most of my food money to spend and realized I could stock up on food, or I could buy seeds, plants and trees for my garden/yard. I ended up getting the latter. I admit, I'm a sucker for getting out in the yard and planting stuff in the garden when the weather becomes warmer. Plus I love buying seeds and plants. So I spent, (drum roll please), $102.07 on groceries, and the rest I spent or set aside for my garden. When I told my husband he said, "Why does that not surprise me?" But hey, I consider it an investment in food for the future.

Wednesday, March 2, 2011

Molten Lava Cakes

I realized I need to take some pictures of my projects... So today instead of a project - you get a dessert because desserts are good anytime! :)

This dessert is one of my favorites lately. They are super fast to make, only take about 20 minutes from start to finish, and use ingredients that are readily available. The only thing I don't like about them - they are gone too fast!

Presenting the.....

MOLTEN LAVA CAKE

MMMMmmmm - so good!!

They are like a little piece of heaven on a plate! You must try these TONIGHT!


Molten Lava Cakes
(makes 2)
Ingredients:

4 Tbsp butter (plus more for ramekins)
1 Tbsp flour (plus more for ramekins)
1/3 cup bittersweet chocolate chips*
1 large egg
1 large egg yolk
2 Tbsp granulated sugar
Powered sugar (for dusting)

Heat oven to 450 degrees. Butter two 6 oz ramekins and dust the inside with flour.

Place the butter and chocolate in a glass bowl and microwave on high in 20 second intervals, stirring after each, until melted and smooth.

Using an electric mixer, beat the egg, egg yolk, and sugar in a medium bowl until thick and lighter in color, about 1 minute. Add the melted chocolate mixture and flour and beat until fully incorporated and smooth.

Divide the batter between the prepared ramekins. Bake until edges are set and center still jiggles slightly, 8 to 10 minutes. Let stand for 15 seconds. Run a knife around edge, then invert each cake onto a plate. Dust with powered sugar. Serve immediately.

Making ahead tip - Refrigerate the batter in the ramekins for up to 1 day. Before baking, bring to room temperature.
Recipe from Woman's Day Feb 2011

*We've also used semisweet and milk chocolate chips. Just increase the baking time - 1 minute for semisweet and 2 minutes for milk chocolate.

Oh and fyi - they taste even better if your husband makes them for you! ;) (Jeff - you are the greatest!!)

The Results Are In

February is now gone and beautiful March is here.  I love the beginning of every month because it means a fresh new budget and PAY DAY!
Money

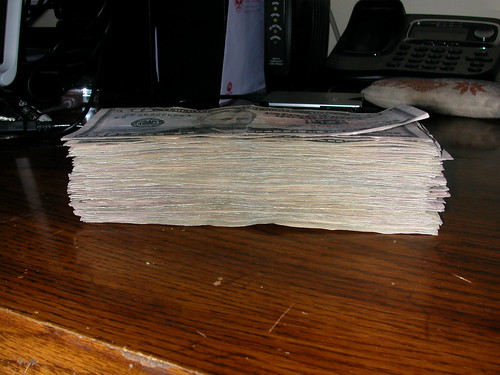
Last month I spent $201.43 for the grocery budget (not including any household supplies or personal items). I had a few things stored in the freezer to help keep the budget low, like cheese that I got on sale last year--November--and some beef Lee bought.

Some key things that help me stay in budget:

*Writing a menu before I go shopping
*Buying only what I need (sometimes I buy other things but I try not to stray)
*If I am not quite sure about how much everything is going to cost, I hold back items and see what the total is before I buy them. That way I don't have to ask to have the item voided--I just don't buy it.
*I look for coupons around the store...One luxury I have shopping on base is there are coupons all over.  I rarely get coupons on the internet and I don't subscribe to a paper to get them either (which those are GREAT sources!) 
*Lee eats lunch at home--we have either sandwiches or leftovers
*We don't go out to eat--we do go out to eat maybe 3 or 4 times a year and when we travel we like to stop at Little Caesars.  $10 for dinner for a family of 7, not bad while on the road.
*We don't buy extras, hardly.  I do buy apple sauce, animal crackers and pretzels at Aldi ($1 per box/bag) or cheese crackers at the commissary when they're a $1. Things like juice, lunch meat, cheese and yogurt are luxuries here. We have treats for Family Home Evening, Sunday night Conference talks and game/movie nights, but those are mainly things I bake from scratch; cookies, cinnamon rolls, brownies, etc. 
*I have a little food storage money set aside each month.  For March it's $30.  Someday it will be higher.  BUT, when fabulous deals come along, like cereal for $0.50 a box, I can buy a bunch and not worry about breaking the food budget!
Feb 23, 2011

The key though to all of this IS to have a budget and stick with the pre-determined spending plan.  Budget, budget, budget.

~Ramen Queen